Archive for the ‘clean it’ Category
Honey Do Weekend – How to Fix a Broken Door Hinge
This past weekend we had a long list of home maintenance and repairs to be done; work in the yard, replace the furnace filter, fix my broken pantry door hinge…. and (cross our fingers…) try to rescue our feverish refrigerator.
First off, my husband tackled the broken door hinge. Even though our home was only built 8 years ago, the pantry door hinge which gets A LOT of use, ripped right out of the door frame. I tried to use a screw driver to replace the hinge, but the screws just spun around. The holes for the screws were stripped out and too large.
Luckily my husband knew just what to do. Here’s how he fixed it:He started with wood glue and matches. You can also use white glue in a pinch. Saturday he used Gorilla Glue because that’s the only wood glue we had in the house.
He dipped the match into the glue to coat it well.
Then he stuck the match into hole.
Once the end of the match was pushed as far as it could go into the hole, he bent the match sideways to snap it off inside the hole even with the door.
Then he replaced the hinge. We left the door open and untouched for 24 hours to let the glue dry.
It worked like a charm! Don’t you just love easy and inexpensive repairs.
Next came the trouble with the refrigerator.
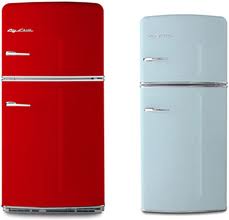
The last thing I want to spend money on right now is a new refrigerator. So last week, when it started acting up, I was worried and a little mad. Our refrigerator is only 8 years old after all. Our refrigerator is a GE profile (not the cool frig above) but was bought because of it’s great rating from Consumer Reports.
About a week ago, we noticed our freezer temperature was way too warm. Despite trying to lower it, it just wasn’t freezing properly. Then I happened to feel the side of the freezer and was alarmed by how hot it was. Our refrigerator seemed to be running a “fever”.
After reading online my husband decided to try cleaning the refrigerator before we called in the repair man.
I’ve pulled it out and vacuumed behind our refrigerator before, so I thought my husband was crazy… cleaning the coils couldn’t be enough to fix it. But, he took a drill and removed the lower metal back panel of the refrigerator. I was shocked at how dusty it was in there… and hot.
Using our shop vacuum, he vacuumed everywhere he could reach, but he still wasn’t satisfied. So he used the blower on the shop vacuum. It blew dust from here to kingdom come… but it also cleaned out the dust from the refrigerator amazingly well.
Once done, we sat back and waited. After a few hours our freezer was much colder… and the “fever” was gone.
So I guess the moral is, cleanliness is next to healthiness. Take my advice and next time you deep clean your kitchen, remove that panel and dust the inside of your refrigerator… it will extend the life of your refrigerator.
In the Toilet
Fair warning friends, this post is in the toilet.
I must admit to having a few self doubts about spending so much time writing and thinking about the inside of a toilet bowl… but a shining clean bathroom is something that makes me happy. I know, call me crazy.
Over the past few years, I’ve been switching my cleaning methods from toxic to CHEAP non-toxic products.
The toilet bowl has been a last hold out, it just seems like the toilet needs a little more umph!
In an effort to be more environmental, I tried Method Toilet Bowl Cleaner Lil’ Bowl Blu… which smells great, by the way. It seemed to work well too, but it’s just too spendy. I can’t justify it. I tried one other “earth friendly” liquid cleanser, but my toilets never seemed as clean and worse, looked dirty really fast.. in less than a week. And while I want clean toilets, once a week bathroom cleaning is all I ever want to manage.
Feeling stumped, I went back to experimenting with different methods and I now have solutions I can live with. I say solutions because I have two methods I’ve been using.
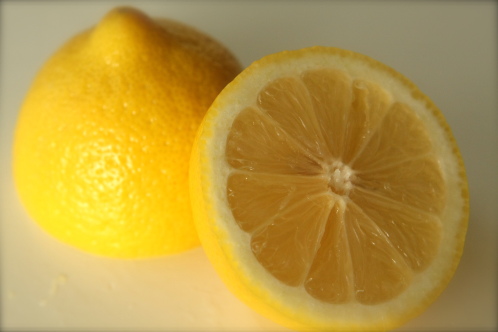
My first choice is: about 1/4 cup 20 Mule Team Borax squeezed with lemon juice. (I use 1/3 of lemon per bowl. I have 3 toilets in my home, and I usually use 1 lemon for all three). I let that sit in the bowl for a while, usually while I clean the rest of the bathroom, and then I scrub it out with a brush or better yet, put on gloves and scrub it by hand. That’s for you Mom. (She is of the opinion that a toilet is never really clean unless you get your hand down in the bowl.)
I love this solution because:
1. It works really well- my toilet bowl is sparkling white. Now, I haven’t put it under a microscope, but it also seems very clean. And it seems to stay clean until my next weekly cleaning.
2. It smells great.
3. It’s cheap!
4. It’s non-toxic.
So why do I have another solution? Well, because I don’t always have an extra lemon in my pantry, that’s why.
I love my other solution too… but because it doesn’t smell as great while I am cleaning, it’s my back-up. I sprinkle in about 1/4 cup baking soda (my old standby) and about 1 cup of white vinegar (my other old standby) into the bowl. Let it do it’s magic for a few minutes, and then scrub it out.
I love this solution because:
1. It’s like a science experiment in the bowl. I love how it bubbles and fizzes. Call me easily impressed, but all that action makes me think that some serious cleaning is going on.
2. It also works really well. The bowls sparkle and seem to stay clean between cleanings.
3. Vinegar has disinfectant qualities.
4. It’s cheap!
5. I always have both baking soda and vinegar in my cupboard at all times.
So that’s my take on the toilet bowl. This blog can only go up from here.
I hope you all have a sparkly clean weekend!
cheers, Calli