Archive for the ‘kids do’ Category
Use it Up on a Rainy Day
“Making it Do” means looking at everything differently. Instead of
just throwing something into the recycling bin or the garbage, I ask
myself… Could this be used for something else? I am amazed how often the
answer is YES when I get creative.
It’s Spring Break and today we were going to make kites and
go to the park for a picnic…. but Mother Nature had other plans. It
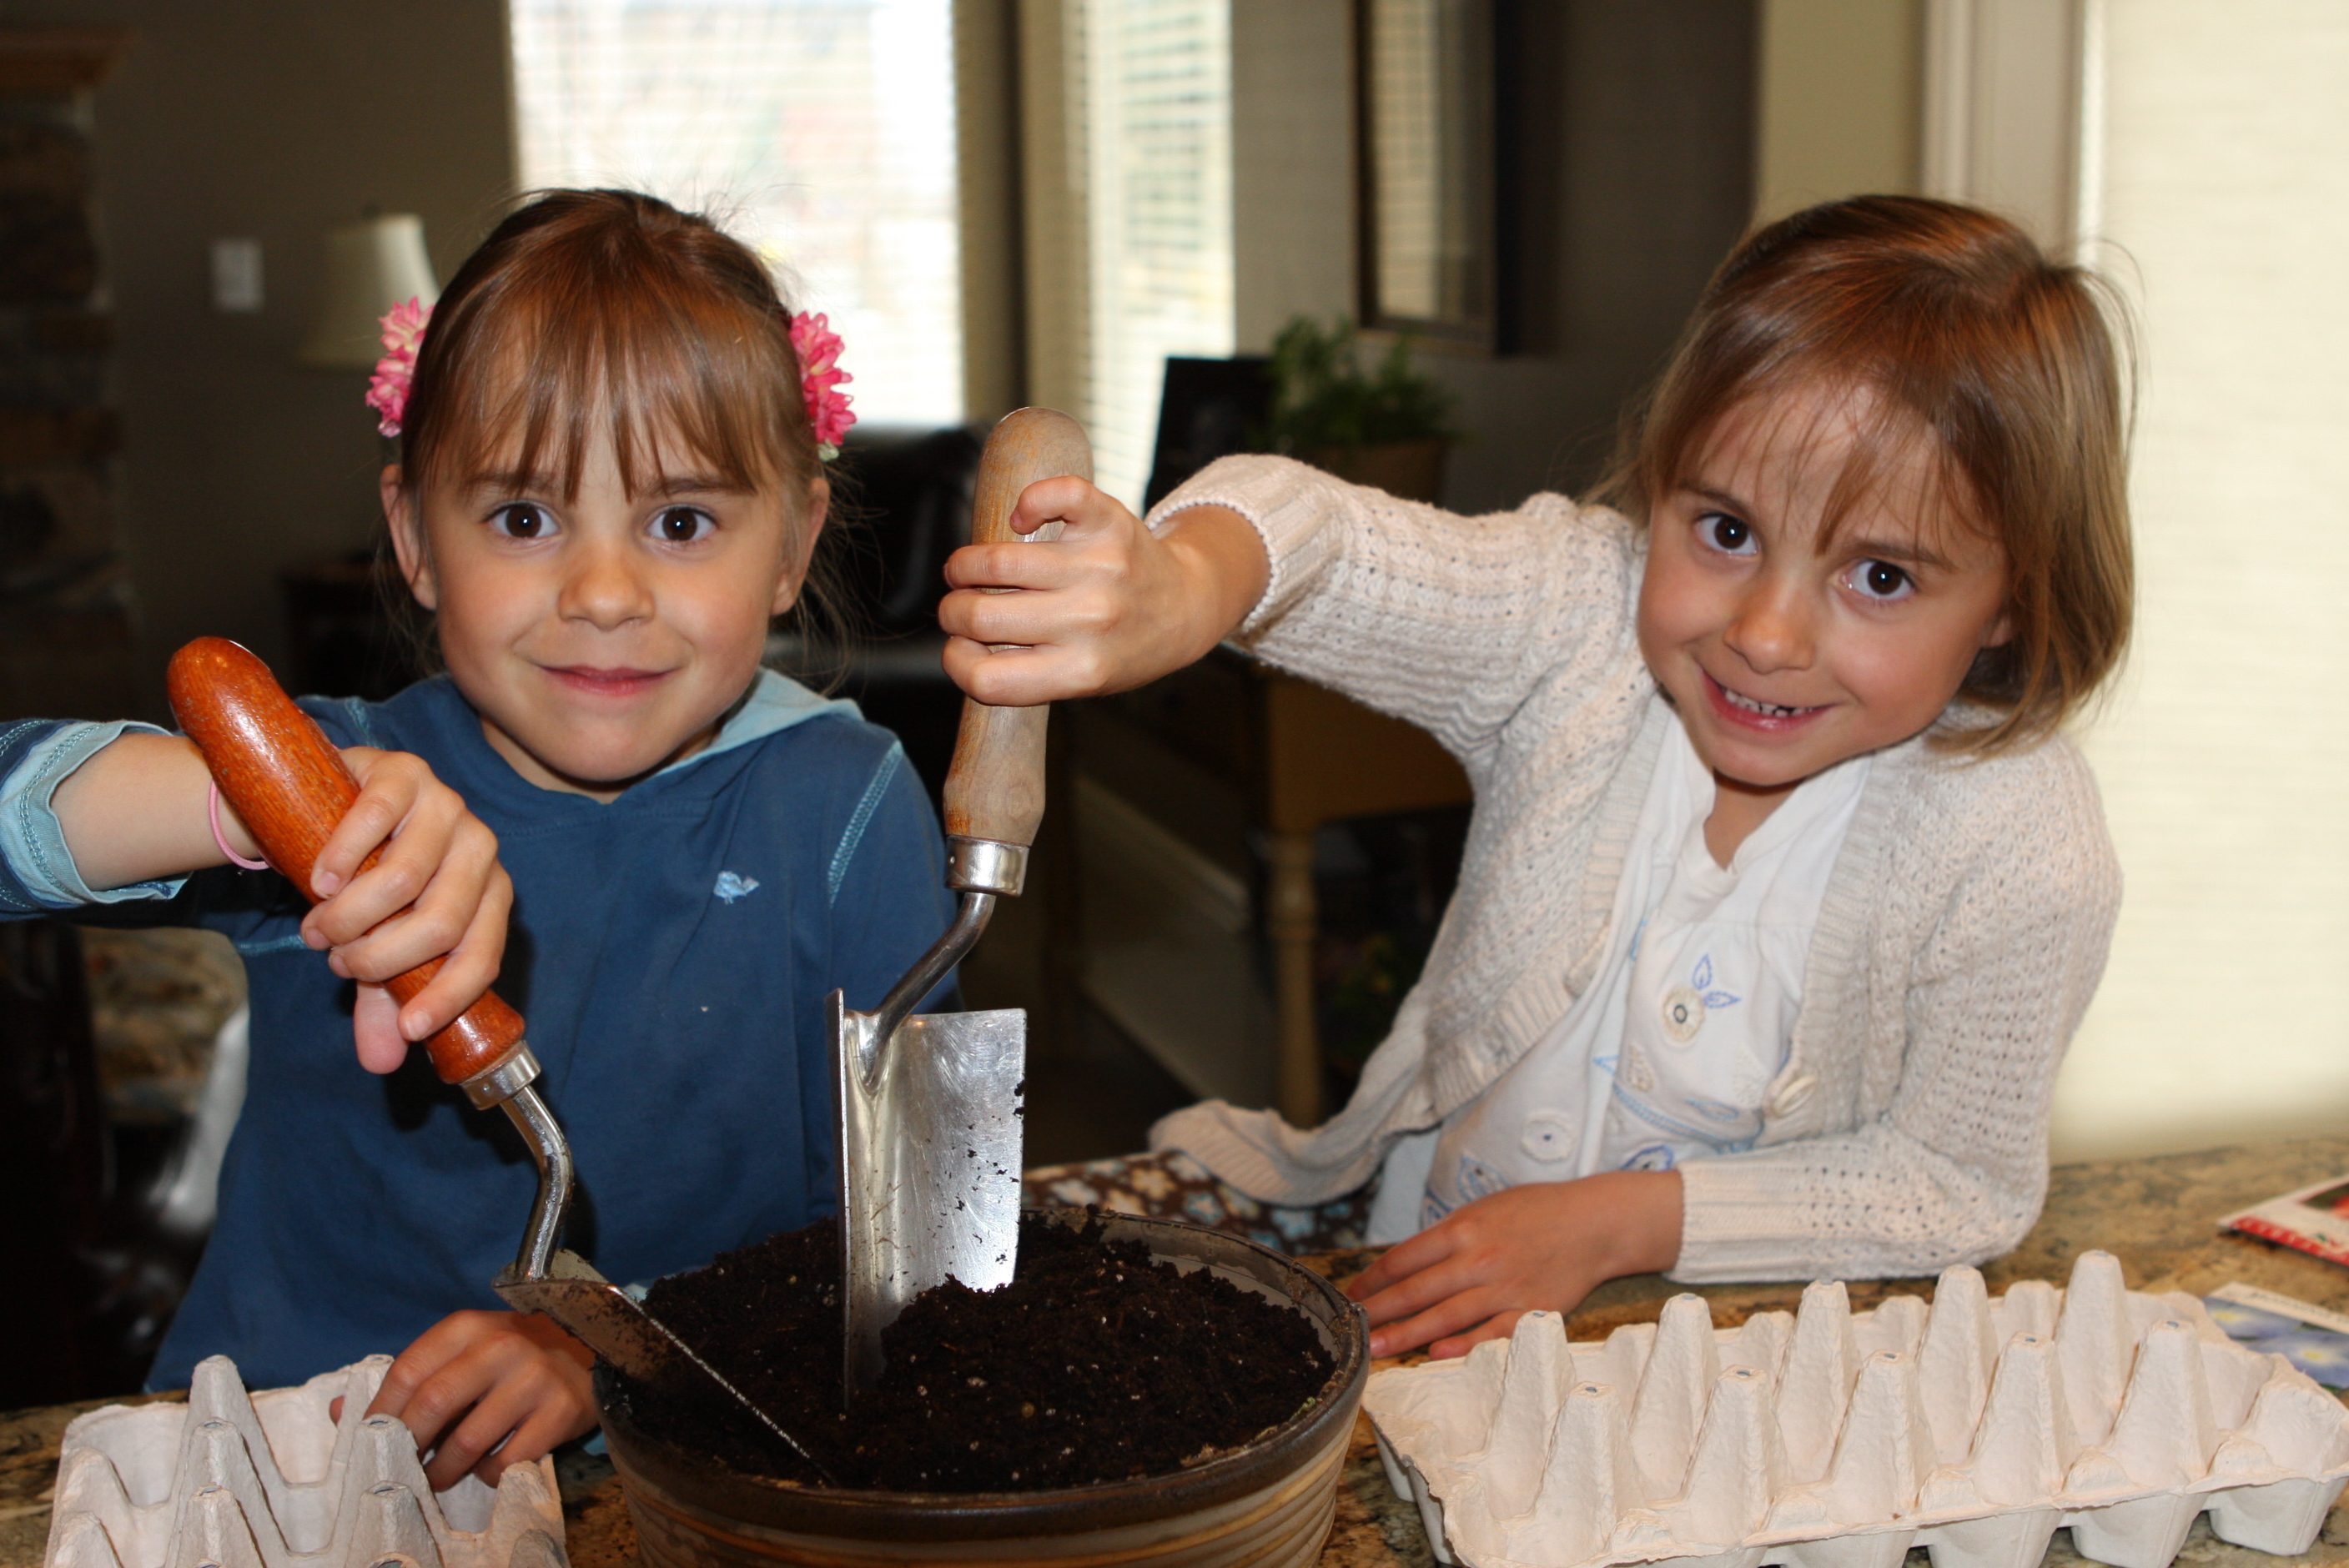
has rained all day. Instead we planted seeds indoors in egg
cartons that I have been saving over the past few weeks. This is such a
great job for kids.
1. Punch a small hole at the bottom of each cup for drainage. This is especially important if you are using styrofoam egg cartons. I prefer the cardboard as you can plant the whole cup directly into the ground and not disturb the seedlings. Plus I really hate styrofoam!
2. Fill each cup with potting soil. (I know, Mom. Avert your eyes… the kids are spilling dirt on my kitchen counter. But a little dirt never hurt anyone and it does clean up. It’s raining, we can’t do this outside!)
3. Following the instructions on the seed packet for planting depth, make a small hole in the soil with your finger in the center of each cup. Some seeds are so small that you don’t make a hole. Just drop the seeds in and cover lightly with a little soil.
4. For larger seeds plant two to three seeds per cup, for really small seeds, I plant four to five. (When the seedlings sprout, you will choose the strongest seedling in each cup to keep and cut the rest back to the soil level with scissors.)
5. Cover the seeds lightly with soil.
6. Place the seeds in a water-proof tray to catch the water. I used an extra-large disposable roasting pan (another reused item.) Once planted, water the plants using a spray bottle. Or if you are in a hurry, pour water in the bottom of the tray and let it soak up. Don’t pour water directly in the cups or the seeds will float all over (not good.)
7. Lay a sheet of plastic wrap over the seed trays to create a “greenhouse” effect. Remove the plastic as soon as the seedling start to come up.
8. Place the trays in a warm, bright, preferably South facing window. Make sure to keep them evenly moist, but not soggy. (Seedlings hate standing in a lot of water.)
9. When you are ready to plant your seedlings outside, just cut the cups apart and plant directly into the ground. The cardboard will break down and become fertilizer. It’s a win/win.
Here are some things to think about:
- WHEN to plant your seedlings depends on the date of the last frost in your hometown. I live in Zone 5 and it’s typically safe to plant tender plants around Mother’s Day. Just follow the instructions on the seed packet. It will say something like: start indoors 4 weeks before last frost. You can call your local nursery and ask when it’s safe to plant outdoors and then work backward.
- I am not too fussy about when to plant seeds indoors, but I mostly plant them a little on the late side. The times I’ve failed planting indoors has been when I plant them too early and they grow too tall and leggy before it’s safe to plant outdoors.
- Some of the plants I have had great luck with from seed are: basil, pumpkins, squash, cucumber, lettuce, spinach, cosmos, marigolds, sunflowers, morning glory (not the weed also known as bind weed, aka my arch enemy,) and moon flowers.
- If your plants are getting too leggy it usually means they are not getting enough light. Move them to a brighter window or if the days are warm, set them outside in a sheltered location during the day, especially just before planting. It can help to harden them off. If you do this, remember things dry out a lot faster outside, so don’t let your hard work shrivel up!
- If you don’t use your whole seed packet, consider sharing the extra seeds with a friend. You can also save seeds until the next year, just be sure to store them in a cool spot. I save them with my food storage in my basement.
Planting from seed is such a “feel good” kind of thing to do. There is nothing like seeing that little bit of green poking it’s head out of the dirt. And because seeds are so inexpensive, it is a great way to “Make it Do.”
Kid’s Night In…
After a day at the zoo, what’s better than going out for pizza and a movie? It might be making really delicious pizza at home, renting a great movie for a $1 at Redbox… and popping popcorn topped with fresh-grated parmesan cheese. Spending $15 dollars for a fun night in instead of $75 going out is a great way to Make it Do. But for me, having fun making pizza, then enjoying the movie in PJ’s and slippers, with my family snuggled up is priceless.
The first step is making the pizza dough. For my recipe, I need to thank my Dad. He started making pizza when I was a little kid. We would go to the Pizza Oven on Parleys Way and he would sit and chat with the owner/chef while he watched him make pizza. Then he got a pizza stone and started making his own. Over the years he has worked on his recipe, trying new things and working to make it better. It’s one of the best pizzas I’ve ever eaten. Here’s his recipe:
Basic Pizza Dough
The dough for pizzas is best when dough is prepared the day (or several days) ahead. Place dough in a large bowl, cover in plastic wrap and refrigerate. Bring to room temperature at least two to three hours before using.
Dough for three 12-inch pizzas:
1 tablespoon sugar
2 teaspoons salt
3 teaspoons dry yeast
1 1/2 cups to 1 1/2 cups plus 4 tablespoons warm water
4 tablespoons olive oil
5 cups bread flour
Preheat oven to 500 degrees. In a small bowl, combine sugar and salt in warm 1 ½ cups warm water. Add yeast and allow yeast to activate about 10 minutes. Add flour, olive oil and up to 4 tablespoons warm water if needed and knead dough until well mixed. Dough is better when slightly stiff. After allowing dough to rise, form into pizza rounds, and rub tops with olive oil. Prebake pizza dough about 2 minutes at 500° F. on a pizza stone or about 3 minutes on a pizza pan. Top with sauce, cheese and favorite ingredients. Cook pizza in the oven until cheese is bubbly and starting to turn golden on the edges between 8- 12 minutes.
Sauce for 2 Pizzas
Simmer the following ingredients in a saucepan while the pizza rounds are being prepared:
2 (15 oz.) cans of tomato sauce
1 tsp. of oregano
1 tsp. of basil
2 tsp. brown sugar
2-3 cloves of fresh garlic
onion powder to taste
celery salt to taste
Since a picture’s worth a thousand words, here’s a step by step:
1. Activate the yeast with salt and sugar. A good rule of thumb for the water temperature is baby bottle warm.
2. In a mixer add the yeast mixture with flour, and olive oil. I use a Bosch Universal Kitchen Machine with the bread hook and I knead for about 5 minutes. You can also use a Kitchenaid with a bread hook. If you don’t have a stand mixer, you can do it the old fashioned way and knead it by hand. Believe it or not, they did make bread before electricity was invented. Just think of it as a toning workout for your arms! (The dough in the picture has just started mixing and is not ready.)
3. Once dough is well kneaded, place in a large bowl rubbed with olive oil. I also rub a little olive oil on the dough. I place plastic wrap right on top of the dough and more over the top of the bowl. You don’t want the dough to dry out. Refrigerate overnight or even a few days. Take out of the refrigerator and bring up to room temperature 2-3 hours before making pizzas.
4. Once the dough is about up to temperature and you are almost ready to start cooking, preheat the oven to 500 degrees. I invested in a pizza stone and it makes the pizza awesome. Make sure to place the stone in a cold oven, and and then heat it up.
5. Prepare sauce. I saute the minced garlic for about 30 seconds or until fragrant before adding the cans of tomato sauce and other ingredients. Simmer sauce on low while you prepare the topping and then dough.
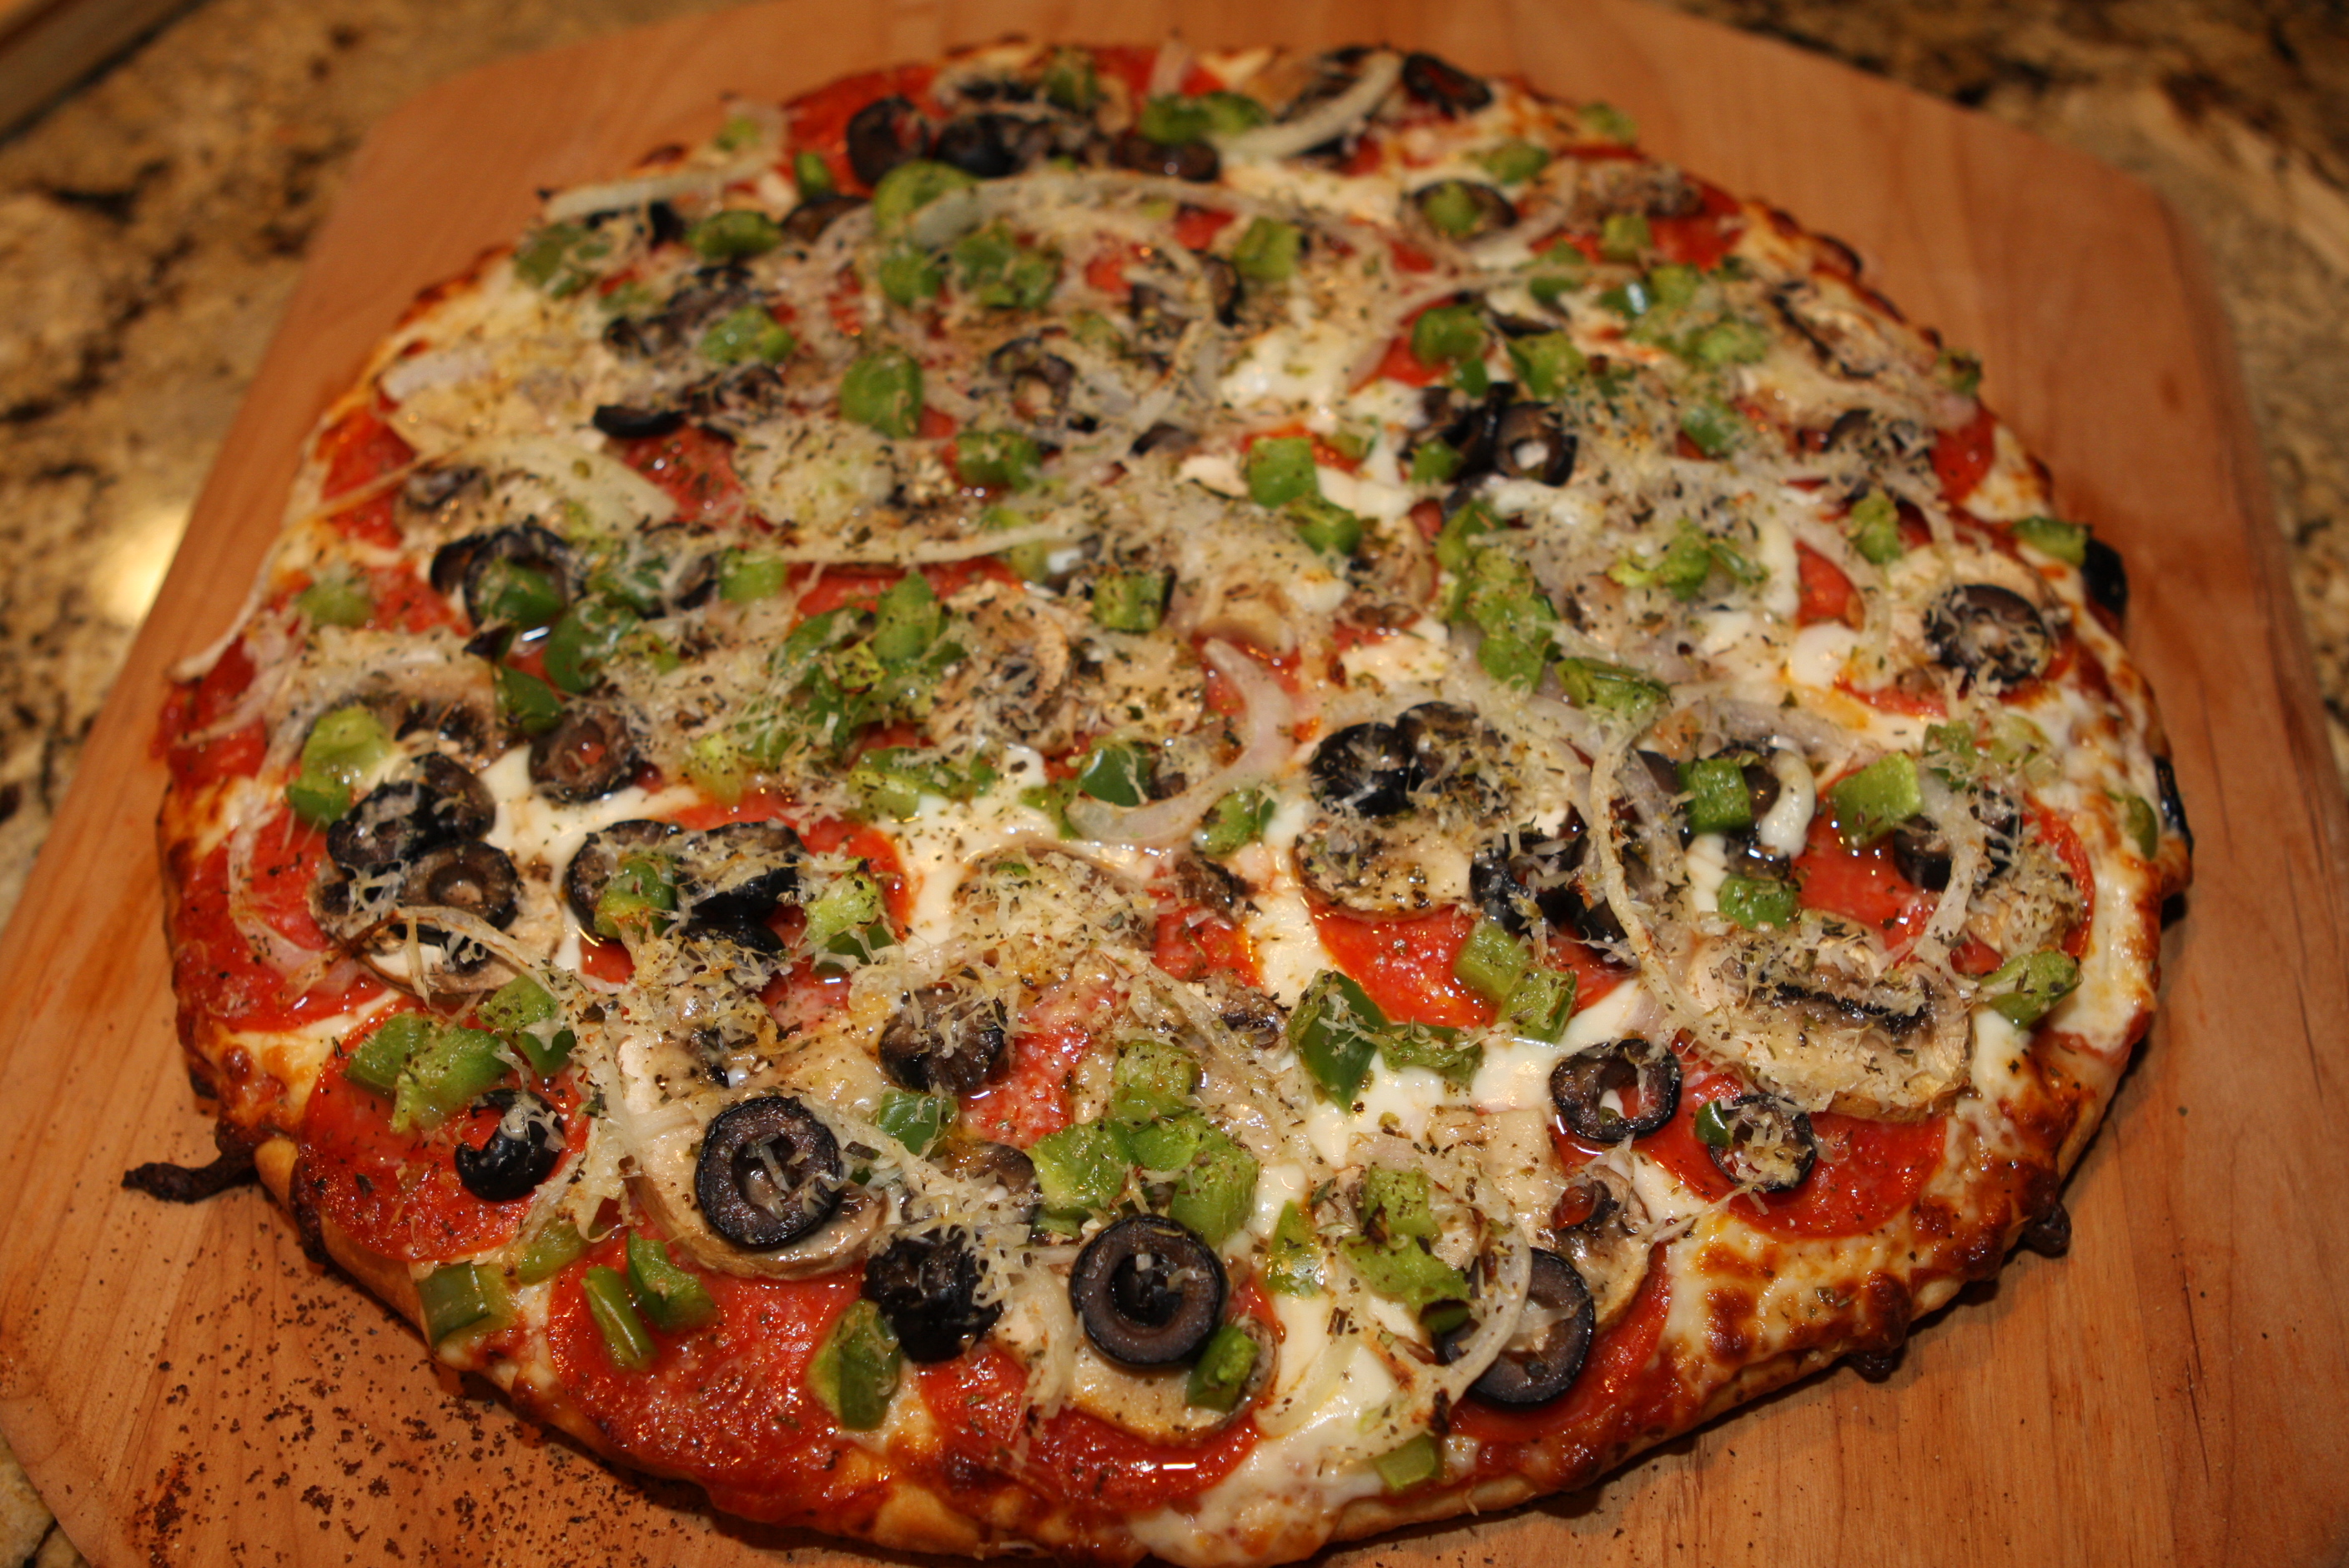
6. Prepare the other toppings. For the three pizzas we use 2 pounds of shredded mozzarella. (Never use old mozzarella unless you want to ruin the pizza.) (The block of Frigo from Costco is two pounds, works well for pizza, and is a good price.) Chop up whatever other toppings you want… Drew likes mushrooms, pepperoni, olives, green pepper, onions and mild Italian sausage. I always precook the sausage. The kids just like pepperoni and olive. I love everything (except anchovies.)
6. Divide the dough into three even balls. Form the rounds by using your fingers and a rolling pin (I am told that real Italians don’t use a rolling pin, but I don’t have all day, so I use one.) I also love to throw the dough up in the air… maybe to make up for the rolling pin and make me feel a little Italian. Or maybe I want to put on a show for the kids. Actually, I really think it does something to the dough that helps get it nice and thin.
7. Once it is rolled out thin, stab it with a fork all over. (This keeps it from forming big bubbles in the baking.) And rub the dough with a good olive oil. Throw some corn meal on your pizza stone and pizza paddle to help things slide. At this point a great tip is to spray the inside of your oven from a spray bottle with water (or place water in an oven proof container in the oven. The moisture helps to make the dough more chewy. Put the dough round on the paddle and throw in the oven for 2 minutes to prebake. If you are using a pizza pan, prebake for 3 minutes. Once dough is prebaked, you are ready to top.
8. From here on out, Drew takes over. He used to work at the Pizza Factory in high school, so I get out of the way and let him do his stuff. He likes to use a ladle to spread the sauce out. He likes a lot of sauce.
9. Drew first spreads the mozzarella cheese. Next he puts on all the toppings. Then he grates parmesan cheese all over the top. Last he rubs about a 1/2 tsp of each of oregano and basil evenly over the top. And it is ready to cook.
10. Slice and eat. Oh man, it’s good.
Now it’s time for the movie, will anyone watch “Babe” with me? Oh… we get to watch “Bolt” instead. Oh well, don’t forget the popcorn!