Archive for the ‘make it’ Category
Laundry Tin and a Giveaway!
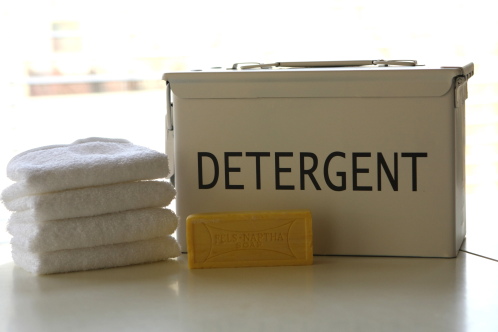
I finished my new laundry tin…
and I LOOOVE IT.
Not only does it look great, it also solves a problem. I buy the large box of detergent from Costco for my laundry. It doesn’t fit in my cupboard, or in the space under my cupboards. It just sits there in the way, looking quite ugly.
My new tin started it’s life ugly too… it was an ammunition box.
I think I’ve improved its form and function. Don’t you?
All it took was a little spray paint and some very cool vinyl lettering.
My lettering was inexpensive, at only a couple of dollars. It was also VERY easy to apply to my tin. The letters were on a strip already spaced perfectly. I measured my tin, made little pencil marks as guides, removed the backing and applied the strip of letter. I used a Popsicle stick to make sure the vinyl adhered to my tin nicely and then peeled off the transfer tape. It took just a few minutes and was super slick.
The inspiration for this project came from a detergent tin from Ballard Designs that sold for about $60. My tin cost a fraction of that.
I got my vinyl lettering from Say It On The Wall and am excited they are sponsoring a $25 gift certificate giveaway here at Make it Do.
You could order this cool vinyl for your laundry room.
What about these awesome labels for organizing your pantry? I love these.
You can also order something custom like I did. There are lots of fonts and colors to choose from. I simply gave Laura the dimensions of my tin and the font and coloring I wanted and she worked out the details.
Be sure to click over to Say It On The Wall to see all of the wonderful vinyls available. You could have a lot of fun with a
$25 Gift Certificate
To enter to win click over and become a follower of Say It On The Wall Blog. Then leave a comment here.
If you’d like to enter twice become a fan of Say It On The Wall on Facebook and leave a comment here saying “I’m a fan.”
Contest ends Thursday January 27 at 10 PM MST.
Winner will be announced on Friday.
To be even sweeter, Say It On The Wall is offering a
30% coupon
to Make it Do readers this week only.
Simply add the code: DO30 when you checkout.
Old Frame Makeover Using Fabric
I have a small stack of old frames from my last home. Though the frames are outdated and worse for wear, I’ve hung onto them with the idea that one day they would be candidates for a makeover.
The first frame’s flat edges made it the perfect candidate to be covered in fabric.
Here’s how:
Here’s is the unmade-over frame. Yes, I did buy it in the 1990’s. Thank you for asking.
Carefully press the fabric. Lay the frame over the top and trim the fabric so that there is enough fabric to wrap around the edges of the frame. For my frame I trimmed the fabric with 1-1/2 inches of overlap.
Using a staple gun, I attached the fabric to the frame the way you would an upholstered chair cushion. Like this:
Staple the middle of the top and bottom and then the sides. Then working in the same direction of top, bottom, side, side work your way out to the edges.
At the corners, I stapled the fabric at the bottom right at the corner. Then I made a fold at the side, like wrapping a gift and staple it into place. For my frame I thought the fold would look better at the sides.
Here’s what the top of my frame looked like. Now for the openings…
Working from the center, I cut an X out to each corner.
I stopped about 1 millimeter short of the corner.
Fold back the flaps and insert the glass, mat and photo.
Once the frame back is secured, give the triangles sticking out a firm tug to tighten the fabric on the inside of the frame.
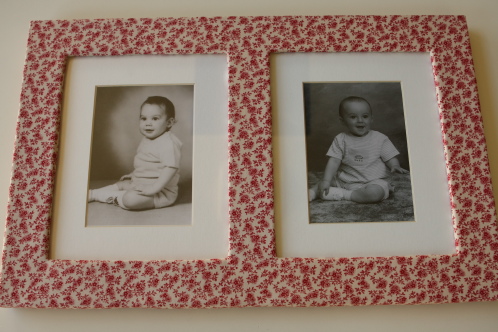
Staple the flaps to the frame if desired and trim away the excess fabric. And I’m done.
This frame is going to belong to a picture grouping in my family room that celebrates our family.
The next frame is going to get a lift with a bit of spray paint….