Archive for the ‘make it’ Category
Gifts to Give in Quantity
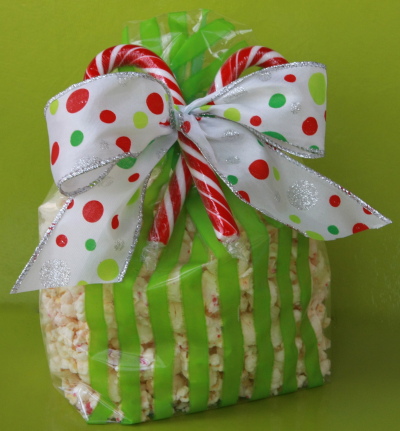
I am the Hospitality Chairperson for my kid’s elementary school PTA.
That means every Christmas, I need to come up with a nice gift for about 70 people, including all the staff and teachers. Of course, my budget is next to nothing. Every year my goal is to give something that is thoughtful, and let’s them all know how much we appreciate the amazing job they are doing with our kids.
Last year we gave Peppermint Popcorn, like the bag shown above.
Another year, we gave potpourri in a cello gift sack. We kept the orange whole. It was very pretty, and hopefully was enjoyed, as it simmered on their stove throughout the season. If you are interested in what we put in the sacks, I wrote about it last year.
This year we were thinking along the lines of Hot Chocolate…. like the hot chocolate on a stick from The Givers Log.
Or possible a little jar of homemade jelly and bread.
Decisions, decisions…. Do you have any ideas? What would you love if you are a teacher? I need to figured it all out… and quick.
Carving Pumpkins
Growing up, my family always carved pumpkins with triangle eyes and nose. They were quick, simple and very predicable. I like to think they had a classic charm.
But then I married my husband and found out that pumpkin carving can be serious business…
I loved this headless horseman from last year.
Our pumpkins are never cute or sweet. My husband loves them frightening and spooky. “I vant to suuck your bluud.”
This one reminds me of the final scene from Indiana Jones and the Raiders of the Lost Ark. You know, when the bad guys melt like wax figures (I’m sure they were wax figures).
Just for me, he carved a face last year. And while this pumpkin didn’t have triangular eyes… I felt like I could name him Jack.
I asked my husband to share some of his favorite pumpkin carving tips just in time for Halloween. And here’s what he had to say:
- Cut the circle out of the bottom of the pumpkin when hollowing it out. It’s much easier to light the candle that way. Yes we still use candles.
- Thin the side of the pumpkin you will be carving by scraping it with a metal spoon. He tries to thin it to about 3/4 inch thickness. If you thin the surface too much the pumpkin will be weak and prone to breaking. Leaving it too thick makes it hard to carve an intricate design.
- It’s my job to stipple the design onto each pumpkin before carving. I like to attach the design with masking tape, it sticks better than Scotch tape.
- There are lots of free resources to find templates online… I love the ones from Martha Stewart. There are also a few site that provide wonderful patterns for a fee. You can also draw a picture or find a scary scene and make your own template.
- Always carve the most intricate areas first.
- After carving, save your pumpkins in a tub of cold water (even throw in a few ice cubes) to keep them fresh for Halloween night. This helps rehydrate the pumpkin so it doesn’t get shriveled and allows you to carve a day or two ahead of time.
- If you have a very intricate design, and need your pumpkin to last you can even coat the carved area with Vaseline to seal in the moisture.
- And of course, save your seeds and toast them! Yum!