Archive for the ‘sew it’ Category
Quick and Easy Mending Kits
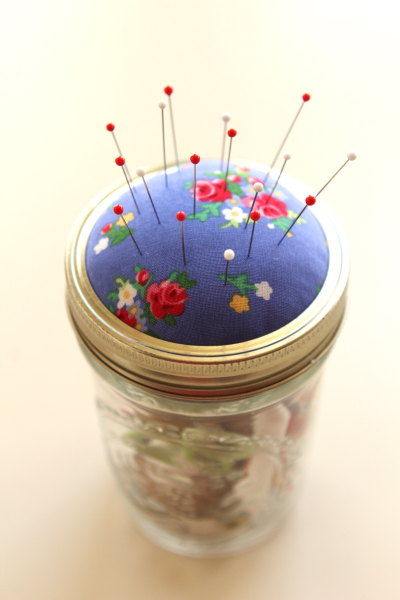
This past Monday I taught a little class about mending to a group of 10 and 11 year old girls.
Since we had a small budget, I put together inexpensive mending kits for each of the girls, inspired by a video tutorial on Martha Stewart.
Is there no end to the wonderful uses of the humble Mason jar?
A Mason jar mending kit makes a wonderful gift for a friend, a newlywed, or a student heading off to college.
They are quick and easy to put together and SO much prettier, and more useful, than the cheap, toss-away kits sold at the grocery store.
Tips for Sewing at your Kitchen Table
I dream of having my own sewing and craft room with a big, sunny window, and lots of lovely organization.
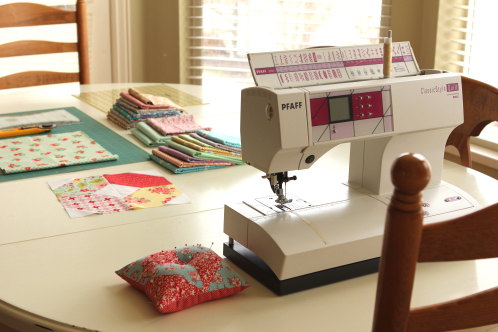
But until then I sew at my kitchen table.
On the bright side, sewing in the kitchen means that I am always close to my family. My kids can work on their homework at the kitchen island and I’m right there to answer questions… since I’m so brilliant at algebra. I’m part of, and not separate from the flow of my family, even when I’m busy working on a big project.
The downside is obvious.
The mess.
Stacks of fabric. Stacks of blocks. Mat and cutter. Scissors. Pieces of thread everywhere. Ironing board in the way. The occasional pin or needle in the carpet (ouch!). Patterns. Embroidery Floss.
Mess.
I’ve had a few people ask me lately how I keep it all straight… and the honest answer is that I don’t.
But over the past year, I’ve been working on cleaning up my act.
One of my mom’s favorite sayings has always been:
That’s my number one tip for sewing in your kitchen.
I know it sounds obvious, but getting organized is the best way to sew in your kitchen… and not drive you or your family crazy.
Here are a few strategies:
I keep my projects separated in 12″ x 12″ Protect-n-Store boxes. Each of those boxes is a quilt I’m currently working on. For the most part, I’ve found these boxes are perfect for holding my fabric and finished blocks for a single project.
The boxes aren’t pretty (and they feel a little flimsy). But unless I try to store a quilt back, they are big enough for most of my projects.
I love that they are super cheap, and make it easy to take a project with me, if I’m sewing at a friend’s home or at my mom’s.
I purchased my boxes at a local craft and hobby store for around $3 a box.
For storing fabric, I needed an option that was mobile. I keep all my craft supplies and fabric on shelving in my unfinished basement. When I start working on a project, I always “shop” from my stash, before going to the fabric store. Which means I cart my fabric up and down the stairs OFTEN.
The solution is Sterilite 25 quart containers (approx. 24″ x 15″ x 6″) from down to the Walmart.
I keep my fabrics sorted by style first (30’s, modern, Civil War) and then by color within that style, so it’s easier to find what I need.
Some of my fabrics aren’t sorted by color, but by collections. For instance, I have my Denyse Schmidt’s Katie Jump Rope together and all my collection of Bonnie and Camille Marmalade in one place. If the collection gets small, then they’ll go into the rainbow.
The trick is putting it all back in the right place at the end of the project ; ).
The other problem, that I still need a solution for, is what to do with my scraps. I almost never throw fabric away. And since I really do use even little scraps for things like 1/2″ hexagons, I keep them all. Right now they are all in a big bag… and it’s not working out too well. If you have a mobile solution for your scraps, I’d love to hear.
Yes, more plastic bins. They are so ugly. And so useful.
I keep most of my sewing and craft supplies sorted in plastic shoe box bins, purchased from Costco. The little labels are actually for jelly or jam, but they work great to keep me organized and give my boxes a little style.
I use these boxes for keeping my embroidery hoops and supplies, hexagon paper pieces and cut fabrics, sewing notions, etc.
The bins fit nicely on the shelving in my basement, to be brought up as needed.
Ideally I would have a closet close to my kitchen table for all my supplies, but since I don’t, I leave my ongoing projects on the table and we eat at the island, or I move my boxes and machine to the area under the window in our breakfast nook.
If I keep my supplies organized as I go, it’s easy to clear it away before dinner.
I’m the first to admit, sewing in your kitchen is not ideal. But I have a funny feeling that when I do get that sewing room I dream of, I might be a little lonely in there.
I hope some of my tips are helpful to those of you who also make it do without a sewing room.