Hi, I’m Calli
Welcome! If you enjoy your visit, be sure to follow me:
Oh My Stars!
Canning Day Quilt

Archive for the ‘sew it’ Category

Early Mother’s Day

I’m not really in the habit of buying myself Mother’s Day gifts.  My husband is one of the best gift givers I know, so I don’t have to compensate by buying my own.  He gives me gifts that I really love… like well-made garden gloves, a perfect soup ladle, a tubtrug or a bird’s nest necklace.  Other than the necklace, a lot of women would not like the gifts he’s given me over the years, but he knows me well and knows I’d rather have a perfect soup ladle than a bouquet of cut roses any day of the week.

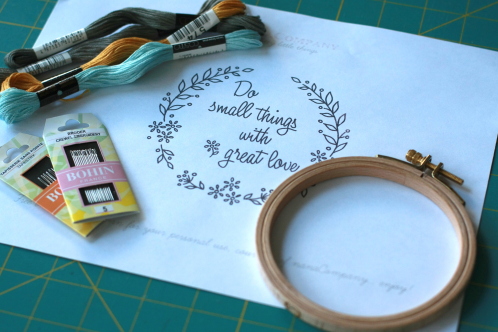
But a few weeks ago, I splurged on myself just a little.  I ordered a new embroidery hoop and needles from one of my favorite bloggers, Alicia from Posie gets Cozy.  I’ve only ever had a super cheap hoop, so I couldn’t wait to open my package when it arrived.  The new hoop is truly well-made and lovely.  It was $6.50 and should last me forever, so I don’t feel too guilty.

I splurged too when I was at a Material Girls Quilts a few months ago and bought some Cosmo embroidery floss.  I gasped a bit at the price, but when Shelby at the shop told me that it isn’t as inclined to knot and it stitches smooth as butter…. well they had me at knot.  And the colors… swoon.

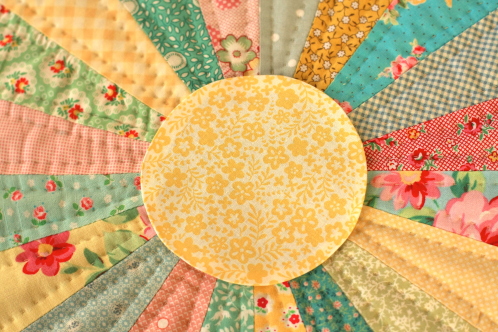
I found the perfect project to try out my new tools yesterday when I dropped by NanaCompany.  Amy has created a new free embroidery pattern that she stitched in the center of a Dresden Plate.  The quote from Mother Teresa is one that I love.

I just wish I could play hooky again this morning and get started, but too many things are pressing in… At least I have a carrot in front of me today to finish my work quickly.  If all goes well maybe I can have a quiet moment on the porch swing later today.

“We cannot do great things,

but we can do small things with great love.”

~ Mother Teresa

Easy Perfect Circles

I recently shared the Dresden Plates made by my daughter and me.

She made her’s at my mom’s house.  I  had made my center and was hand appliqueing it on when Emma came in with her plate.

I looked at her center…. then I looked at my center.

Doh!

Her center was perfectly round.

My center was not.

That’s because she made it with my mom.  So I got on the phone to find out the method she had used to make it.

Here’s how she makes them… and the method I’ll use from here on out.

You’re going to need your fabric of course, a hot iron, fabric starch, and a template for your circle.

I’m using a template from Karen Kay Buckley’s Bigger Perfect Circles.  She has a range of circle templates, but the bigger template is what I need for the Dresden Plate.

You can also easily cut out a template out of poster board or the type of cardboard on the back of a notebook.

I traced my circle around my template on the back of my fabric using a pencil.   Be sure to leave a quarter inch space around the template for cutting out.

Cut around your circle leaving about a 1/4 inch or so.

Spray a little of your starch into the lid of the spray starch.. it makes it easy to work with.

You can use a brush or Q-tip, but my finger worked just as great.  Dip your finger in the starch and dab it around the outside of your circle.

Stick your template back in the center.

This part was hard for me to photograph because you really need two hands.  But move the tip of the iron around your circle, pushing your fabric up around the template until the fabric goes tightly around the template forming a perfect circle.

Don’t worry as long as you don’t leave the iron sitting on the template it’s doesn’t have any trouble with the heat.

It’s now easy to remove the template from the center of your circle…  unlike when you use the stitch around method.

Pin it to your project and hand or machine applique it into place.

Easy, perfect circles every time.

Now I’m wishing I had used a happy yellow circle in the center of my pillow!

To unpick or not to unpick… that is the question.

Archives


Virtual Quilting Bee