Archive for the ‘sew it’ Category
A Book Review: Girl’s World by Jennifer Paganelli
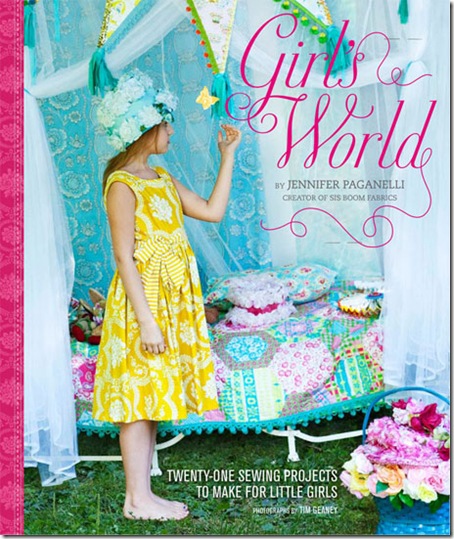
A few weeks ago, I received a package with Jennifer Paganelli’s new book Girl’s World: Twenty-One Sewing Projects to Make for Little Girls inside. Jennifer of Sis Boom kindly sent us several copies to be given away at the upcoming Blogger’s Quilt Market Meetup. Of course this book could not have remained unopened in a box in my home. I carefully untied the bow, opened it up and (gently) leafed through it. It’s that kind of book… it’s so lovely you want to curl up and enjoy every page. This is exactly what I was doing when I felt someone (or two) hovering at my shoulder. The cover had drawn my 9 year old twin girls like bees to honey.
They oohed and awed over every page… and I heard, “Mommy can you please make that? And that! I love that…” about 50 times.
Yes, Jennifer Paganelli knows girls. This book is full of beautiful ideas, lovely dress patterns and wonderful craft projects. Some of the projects look easy enough that my girls could make them.
The photographs throughout the book are incredible. The colors and fabrics are bright and lovely. I read through the instructions of some of the projects and was pleased that they seemed clear and logical.
In case you are a beginning sewer and want to learn, Jennifer also let me know that she she will be teaching a virtual sewing class with Dolin O’Shea on the Virtual Radio Network, where they will be teaching the Mary’s Fancy Sash Dress (a dress I would love to make for my girls). The class includes an autographed copy of Girl’s World. It will be suitable for beginning sewers and will teach techniques such as arm holes, gathering the skirt, darts, hemming, and how to sew with elastics… among many other things. The class also includes a one hour live chat with the delightful Jennifer and Dolin O’Shea.
I can’t wait to get my own copy of the book, and will definitely be making more than one of the projects. My girls can’t wait to make a stuffed George the Puppy and I will be making the Patchwork Memory Board for their room.
Thank you Jennifer for sharing your lovely book. For those of you coming to the Blogger’s Quilt Market Meetup, you might just be lucky enough to win your own copy!
Good Egg- Easter Tee-Shirt Tutorial
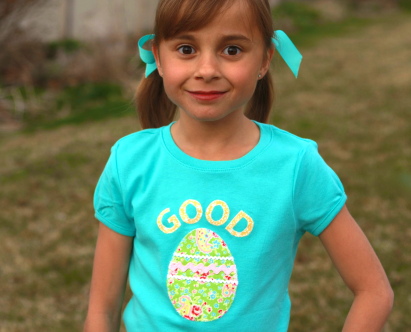
Last week I whipped up a little Easter Tee for my girls…
When I say whipped up, I really mean it. This is a quick and easy project. It is also very inexpensive. I picked up the tee-shirts for about $4 each from Old Navy and all the rest of the supplies were leftover from other projects.
You will need:
- Scrap fabric
- Rickrack – I used mini white and a standard sized pink.
- Heat’n Bond Lite Mine was left over from another project.
- You can download my Good Egg Tee-Shirt Template here.
Here is the easy step by step:
Lay out the fabrics to see how they look. Yep I like it. Super springy and sweet.
Trace your template onto the paper side of your Heat ‘n Bond. Again, you can download the template by clicking here. Notice the lettering is in reverse… but that’s all taken care of for you on the template.
Iron your Heat ‘n Bond onto the wrong side of your fabric.
Cut it out. Good small scissors are really helpful here. I love my Gingher Embroidery Scissors, they are the perfect tool for this (and countless other) sewing projects.
Lay it all out where you want it… to make sure you are on the right track.
Stitch the rickrack across the egg. I found it helpful to let it overlap when stitching, and then cut it down after it’s stitched on.
Peel the backing off of the Heat ‘n Bond and, after carefully arranging the pieces, press everything into place.
Since Heat ‘n Bond doesn’t last forever… I stitched everything into place using a small decorative blanket stitch. If your machine doesn’t do a blanket stitch, you can also use a small tight zigzag. It’s best to play around with your stitch on a piece of scrap fabric before committing to the shirt.
Tip: Stitching on a tee-shirt can be a little challenging due to the stretch factor. You can apply a little featherweight fusible interfacing to the back of the tee-shirt behind the lettering. I didn’t bother and I did just fine, but it takes a little more patience to keep it from stretching. I think my machine’s walking foot helped too.
It was an easy-peasy, fun, little project.
My good little egg loves her new tee. “It’s an idiom,” I told her. “It means you’re a wonderful person.”