A birthday party starts with an invitation. And for a 1930’s party, an invitation that looks like a handkerchief is just about perfect.
A quick internet search turned up the perfect template for my invitations…. found at Eat Drink Chic by Amy Moss.
Amy’s handkerchief templates were so lovely and perfect, I ended up using them not only for the invitations, but for the party too.
Here’s how I made my invitations:
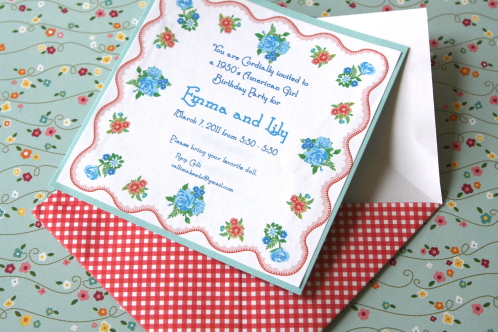
It started with one of Amy’s handkerchief templates. I modified the template slightly to remove some of the flowers, so I could cleanly fit my wording.
I used Illustrator to create the invitations because I was modifying the template, but you can easily use Word if you are leaving the template as is. In fact, I used Word for the other hanky project for the party. To use Word, simply copy and paste the image. Then create a text box layered on top of the handkerchief image, center the alignment, choose the font and font color and type away.
The font I chose for the invitations looked very 1930’s to me. It’s called Calamity Jane NF. I colored the font blue to match the hanky.
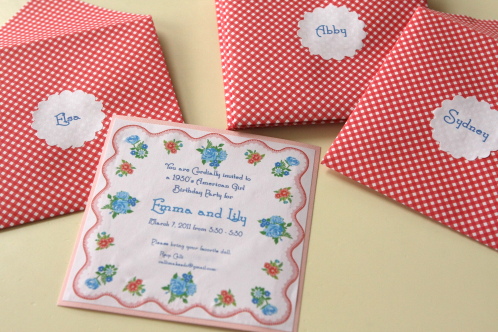
I printed out the invitation on nice white printer paper, trimmed them down and mounted them on cardstock. The finished invitation was 5 inches square.
But now I needed a square envelope… which I had trouble finding at the store. If you can’t find what you need, make it instead.
Here is how I made a simple square envelopes to fit my 5 inch invitations:
Cut your paper of choice in an 8-1/4 inch square. I choose printed paper over cardstock since it’s much easier to fold and makes a very suitable envelope.
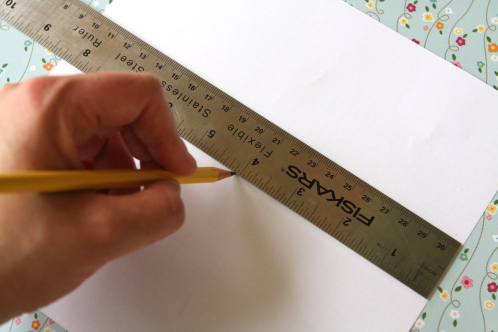
Make a mark in the center of the square (4-1/8 inch from all sides) with a pencil.
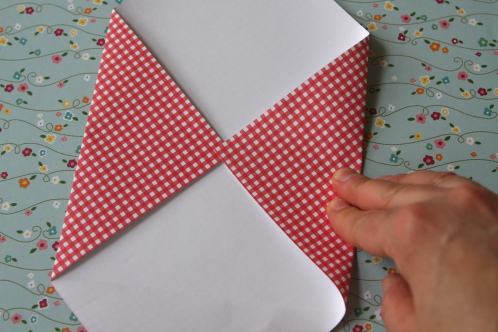
Fold in both sides about 1/4 past the the center mark so that they overlap like shown. On the first envelope I folded, I checked my invitation to make sure it fit. Then proceed.
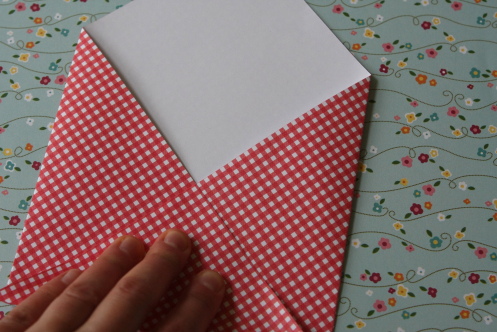
Fold up the bottom so that the point comes neatly to center.
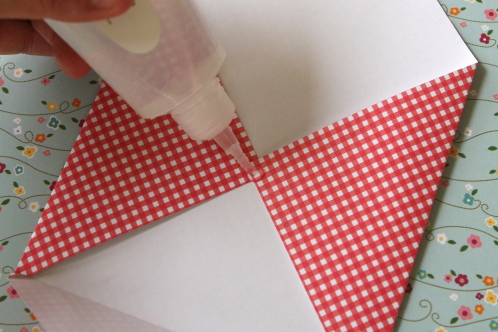
Then carefully glue or tape down the edges of the triangle. I used a permanent glue called Create from Martha Stewart. Take care not to let the glue spread into the inside of the envelope.
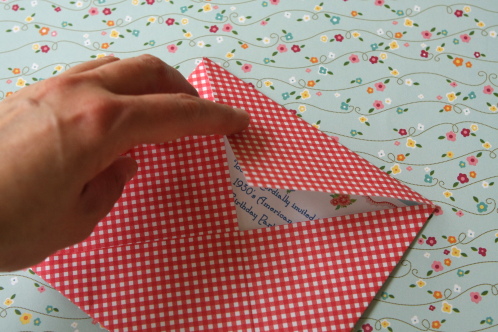
After the glue has dried, place your invitation in the envelope and fold down the top.
To address the envelopes I printed the girl’s names in a Word document in two columns spaced the names apart. Again I used Calamity Jane NF and a colored font. Once printed, I punched them out with my favorite 2″ Scalloped Paper Punch and glued them to the envelope.
I used a white circle dot sticker to seal the envelopes shut.
It was a bit of work for the invitations, but I LOVE doing a project like this. It’s like being back in art class… and I loved art class. It was also very Make it Do. The cardstock and paper were purchased on a 30% off sale at Roberts Arts and Crafts. And I simply used nice white printer paper for every thing else. The whole project cost me only a few dollars, and much less than had I purchased invitations, and they looked EXACTLY like a wanted them to.
Be sure to check back this week for more 1930’s party fun….
***********************************************
On a side note: Yes, I know I said this would be posted yesterday…. Achooo.
But I came down with something yesterday…. (sniffle, sniffle) so did my husband… and he NEVER gets sick. In fact, LOTS of folks in Utah came down with something yesterday… I know because I saw them in the lift line (I mean at the doctor’s office!)
OK, OK I am a terrible liar. It snowed 35 inches in the mountains here in the last few days. AND THEN the sun was shining when we got up yesterday morning. Holy Pow, Pow Bat Man. We’re going skiing! So we played hooky and hit the slopes. Utah powder is so light and soft, it was amazing. (Right up to the point that my husband had a little wreck and gave up a couple teeth for Lent. Doh!)
How adorable… I love it!
Your invites turned out beautifully, Calli…sounds like you had a fun day in the snow too. Enjoy every moment! :)
What a sweet party…