I could wile away the hours
Conferrin’ with the flowers
Consultin’ with the rain
And my head I’d be scratchin’
While my thoughts were busy hatchin’
If I only had a brain…
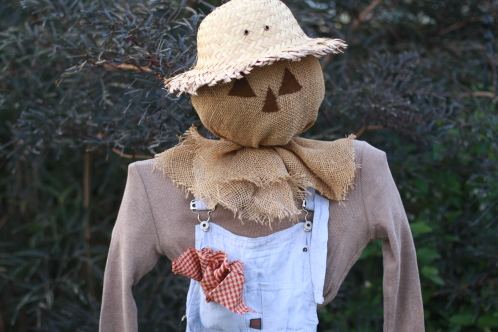
There’s something homey and humble about a good scarecrow.
They are so make-it-do that it seems like a shame to ever buy a scarecrow. They should be made using an old holey shirt and overalls that have seen better days.
My kids and I decided to make a scarecrow yesterday. I decided he needed to be made with whatever we could find on hand.
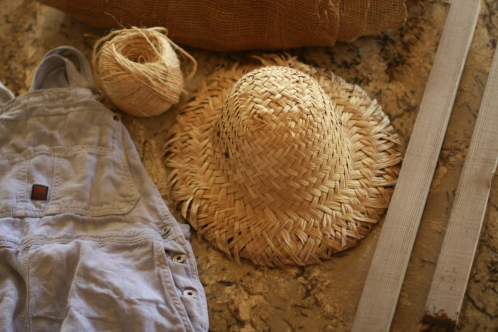
Here are the makings of our scarecrow:
- 8 foot wooden garden stake. I cut 18 inches off top with a chop saw to make him a better height, and to use for the shoulders. The stake will still feel tall, but it will be hammered into the soil, so it’s a great size… you can always cut it down more if you’d like a smaller scarecrow, but you can’t put it back.
- Twine. Good for a million and one uses including a scarecrow.
- A large brimmed straw hat. We couldn’t find a large straw hat on hand, but the girls found an old dollar store safari hat from our dress-up box. They set to work with a seam ripper to remove the plastic binding on the edge of the hat. With a little pulling and fraying the weave, we had a very suitable hat. It’s a bit smaller than I’d like, but it was easy and free.
- Burlap. From my garden supplies. For wrapping up a tree to protect it from the deer in winter, perfect for making a scarecrow face. (A burlap potato or coffee bag would be nice too.) Burlap stinks by the way.
- A bit of brown felt for eyes and nose.
- An old worn out shirt.
- Old overalls. We scored and found a holey linen jumper in my maternity clothes box. Yes, I wore an overall jumper. I assure you it was the height of maternity style in 2000. Never mind. Can I blame it on pregnancy hormones? My scarecrow does look super cute in it, if that counts for anything. And yes, I said it was a JUMPER not overalls. That’s nothing that scissors and a sewing machine couldn’t remedy.
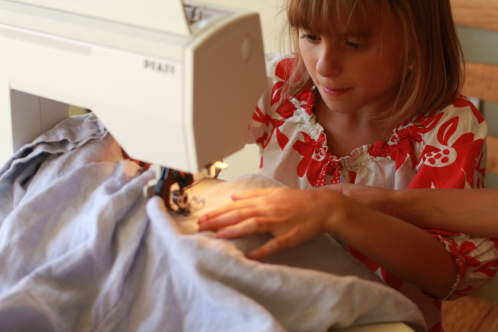
A slit up the front and another slit up the back….
Turn it inside out and pin. Then stitch, stitch, stitch and the girls turned a jumper into overalls. Lily’s hand is reaching in to remind Emma, “You only get to stitch to this pin, then it’s my turn.”
This is exactly when making it do it is fun. The girls loved altering Mr. Scarecrow’s clothes.
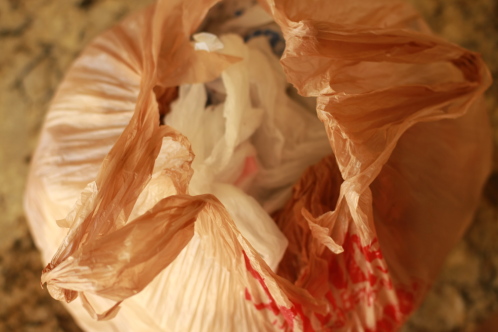
Now for the head. I debated what to stuff his head full of… sawdust, straw, newspapers, hopes, dreams…. Well, I quickly decided plastic sacks beat out newspapers. Newspapers might make for a lumpy head… and not fare so well in a downpour.
So we filled one plastic grocery sack full of other sacks until it was just the right size for a head. Then we cut a nice wide circle of burlap around the sack… approximately 36 inches wide. No need to measure or cut a perfect circle.
I didn’t get a good shot of the stake, but it goes inside the plastic bag that has been tied tight in a knot.
Then wrap the burlap around the bag and the stake. Tie it all tight with twine. I wrapped the twine around several times before tying my knot.
Once you have the head in place, it’s easier to see where the shoulders should be. Hammer the shoulders on with two nails to keep it from rotating.
This was a job perfect for my son. He should be a carpenter he loves to hammer so much.
The eyes and nose were cut free hand out of felt. I was happy to have them be a little wonky. Then I sewed them on his face with a whip stitch. A hot glue gun would have worked too, but stitching only took a few minutes.
I was planning on stitching a mouth and may still. I thought a stitched curved smile with little cross lines would be fun. But I kind of like him without a mouth… so we’ll see. What do you think?
Then all that was left was to dress him up. I tied his shirt around the stake at the bottom and we added a few bags to take away his angular shoulders.
At the last minute we added a handkerchief to his pocket for a little color… and for him to wipe his brow. Keeping the crows away is hard work after all.
The best part of making a scarecrow is it can be a work in progress. The kids think he should have some straw coming out his hands and neck. But we didn’t have straw, but I may try to pick some up.
I also think he needs a few patches on his knees, now that I get a good look at him.
Our whole family is in love with our new scarecrow. There has been debate over his name- Hank or Bob?
Whether or not he’s good at scaring crows, we may never know. But we did find out, to our great amusement, that he’s good at scaring dogs. Our dog, Finn came loping by unawares and stopped in his tracks, then jumped backed like he’d had an electric jolt and barked at our intruder.
Good to know he’s on watch duty, even if he can’t tell the real thing from a fake.
If you’ve never made a scarecrow before, make one this week, it’s good, clean fun!
I would not be just a nuffin’My head all full of stuffin’
My heart all full of pain
I would dance and be merry
Life would be a ding-a-derry
If I only had a brain
– – – – – – – – – – – – – – – – – – – – – – – – – – – – – – – – – –
And just in case you haven’t, be sure to leave a comment on yesterday’s post to enter to win the $25 Visa Gift Card Giveaway.


He is fantastic…looks like a Hank to me!
oh, how cute he is.
I see this post is from a long time ago but I found it so I assume others will as well! I just wanted to comment on using plastic bags instead of newspaper for stuffing. Good choice!! Last fall I pulled my old scarecrow out of the garden shed to decorate for fall. He was stuffed with newspaper. When I layed him on the concrete to make some adjustments MILLIONS if not BILLIONS of ants came rushing out of him in waves! They had made huge nests in the newspaper and he was full of ants. He is now stuffed with plastic bags 😊