Posts Tagged ‘make it do’
Baby Car Seat Cover Tutorial
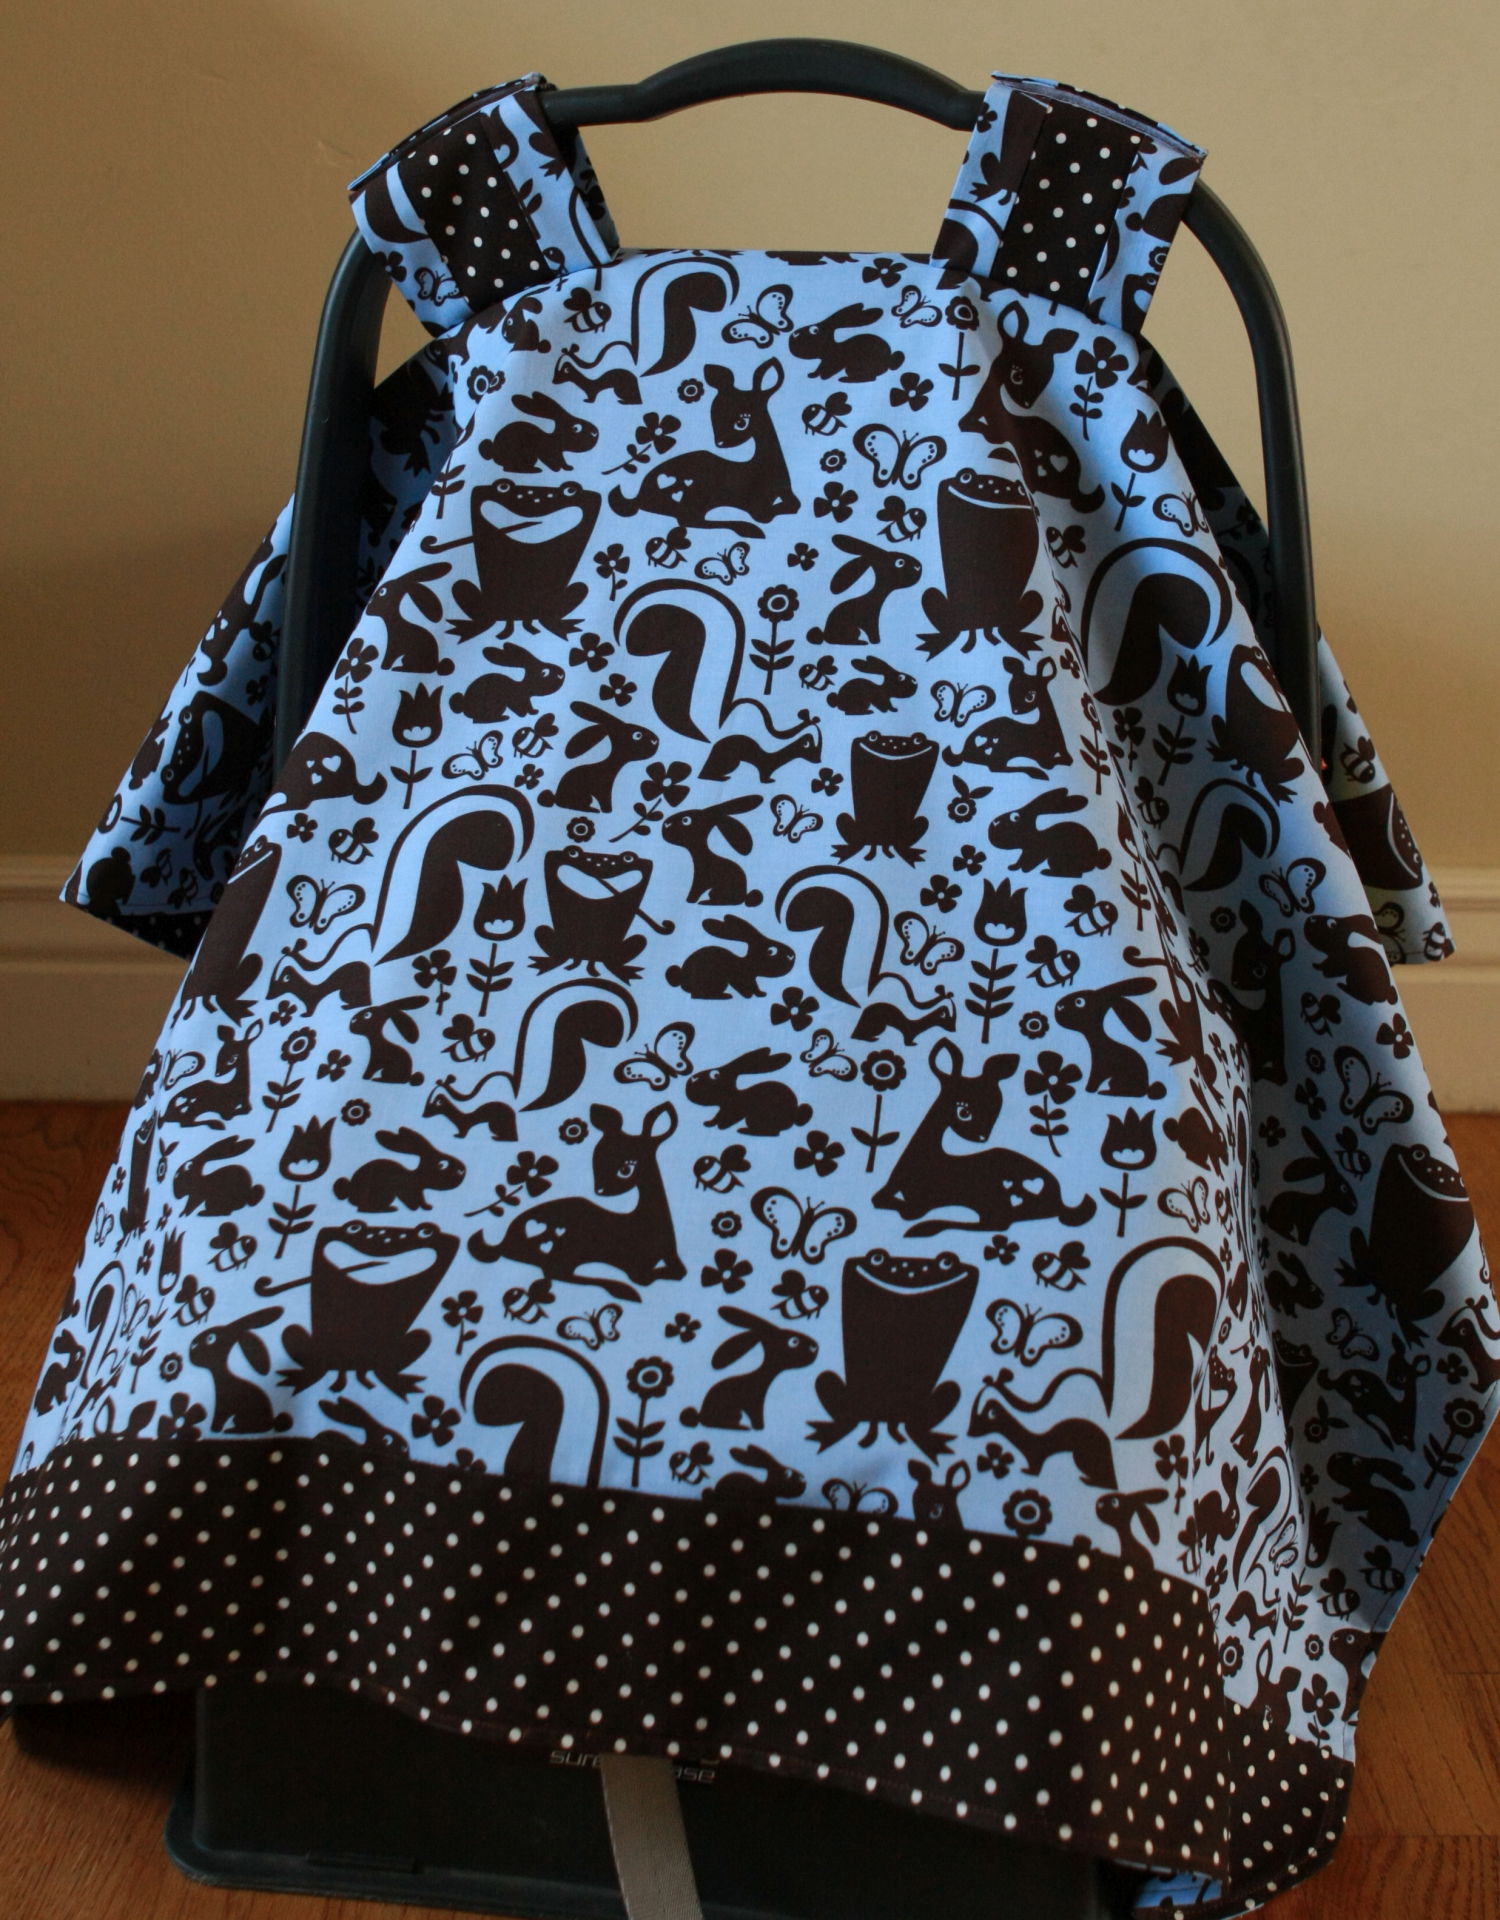
This car seat cover was a quick, fun project for me. It makes a perfect gift for a new baby. Mine is for my new baby nephew, Isaac. A cover is wonderful for keeping a baby asleep, warm and safe from germs when out in public.
This is a project where you can definitely employ your imagination to embellish it as much or as little as you want. I chose to piece a strip of my back polka dot fabric on the front top and bottom. I also pieced the straps… but that was out of necessity. I only bought 1 yard of the backing fabric, and didn’t have enough fabric complete the straps like I wanted, with backing fabric on one side and front on the other… so I pieced them, and in the end I liked them better than the way I had planned. I love when this happens. I make a mistake or run out of fabric, and the fix ends up being my favorite part of the project. I think it’s because I’m forced to think out of the box and get more creative.
Here is what you need to complete this project:
- 1 1/3 yards 100% cotton fabric or flannel for top
- 1 1/3 yards 100% cotton fabric or flannel for backing
- Sew on Velcro (I prefer not to use Velcro with adhesive, as it gums up my needle.)
- fabric marking pen (either water erasable or disappearing) or fabric marking pencil
And here’s how:
1. Cut top and backing fabrics 35″ wide x 42″ long. If fabric has a directional pattern like my top fabric, make sure to cut it so it goes in the right direction. If you are piecing either the top (like I did) or backing, make sure the finished dimensions are still 35″ wide x 42″ long.
2. Create curved corners by placing a bowl in the corner and tracing with fabric marking pen or pencil, as shown. Cut along tracing line. (This curved corner is more than just decorative, it serves to keep the cover off the ground on the corners. Next time around, I would use a larger bowl and take more off for the curve, as the corners in the front of the car seat touch slightly.)
3. Cut straps 2 from backing and 2 from top 4″ x 9 1/2″. (I was piecing the straps, so my “back” polka dot fabric was 2″, and the “top” fabric was cut 6″ thereby making my finished strap the same dimensions.)
4. If you want to do any piecing (like I’ve done), make sure finished dimensions are same as above.
5. For the main body of the cover, place right sides of front and backing together, stitch together using a 1/4″ seam, leaving a small opening. Note: all seams are 1/4″ unless otherwise noted.
6. Clip curved corners and turn right side out. I like using a chopstick all the way around the seam, as it makes for a nice edge. Press well.
7. Using a scant 1/4 seam, stitch all the way around the outside edge to give it a finished look, and to close the opening.
8. To make the straps place right sides of front and back fabric together. Stitch around, leaving one end open. (There are few added steps if you are making the straps pieced on top, like mine. I stitch down the length, leaving both ends open, I pressed the seams out, turned it right side out, and pressed so the straps looked even. Then I turned it wrong sides together again and closed one end. Then continue to step 9)
9. Clip corners and turn right side out. (Again I use chopstick) Press well.
10. Close opening. Repeat steps 8-10 for second strap.
11. Fold straps to check placement of Velcro, pin and stitch into place. I made sure the end which I closed the opening was on the inside and therefore hidden.
12. Press straps in half, to act as a guide. For placement of stitching on the straps (to adhere the straps to the body), measure 4 1/4″ inches in from both sides and draw a line with fabric marking pen as shown below.
13. For placement of straps measure 19″ inches from the top and 11 1/2″ from each side. There should be about 5 1/2″ between each strap and about 21″ from the strap to the bottom. If you are visual like me, see Illustration for strap placement. Pin straps into place. Stitch and then reinforce stitching. (The stitching will be one inch apart, and I stitched in a box shape.)
And it’s done! Remember, you really can use your imagination to embellish this cover. You can add buttons, rickrack, or ribbon. As usual, I like simplicity, and the piecing was enough embellishment for me.
Here’s a quick glimpse of the inside.
Now it’s time to wrap it up and deliver it to my dear sweet nephew.
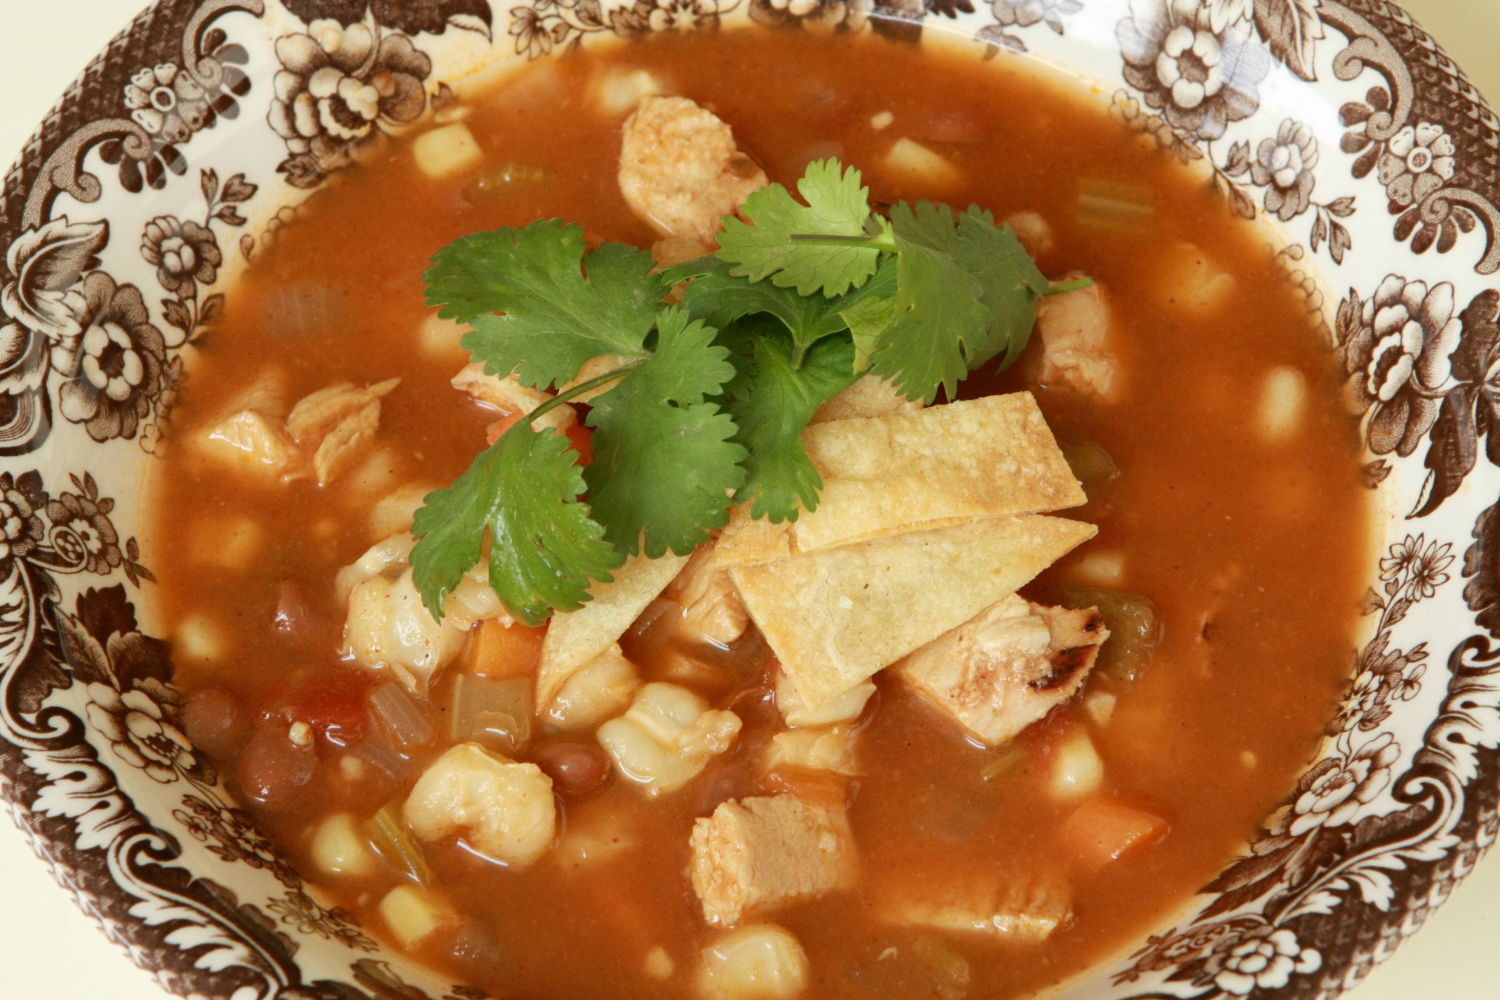
D’s Southwest Chicken Tortilla Soup
This month I am trying to hard to loose weight and get in shape. (Ask me how it’s going in a week or two, when I hopefully won’t need Advil for my sore muscles anymore.) Yep, I’m exercising… and trying to eat right. The only trouble is, I’ve have never been good at depriving myself. My compromise is to find really healthy foods that happen to taste great too.
This recipe comes from my Dad who had a delicious Southwest soup at a restaurant, and went home to fiddle with ingredients until he came up with a recipe.
“Muy Bueno” Dad, this soup is a winner. It even fits right in with my resolution to loose weight, but that’s not why I love it. I love it because it is hearty and delicious and you would never know it was diet friendly.
Here’s his recipe:
Dennis’ Southwest Chicken Tortilla Soup
- 3 or 4 Chicken breasts (depending on how meaty you love your soup)
- ¼ part Lowry’s Mesquite-Lime Marinade
- ¼ part teriyaki sauce (or soy)
- ¼ part any Italian Salad Dressing
- ¼ part Tequila (optional)
Marinate chicken breasts in a Ziploc bag for at least ½ hour in: (each part equals about ¼ cup) Sprinkle with Lime or Lemon Pepper. Grill over medium heat for about 7 minutes each side (until firm to touch but not overcooked) Cut into bite-sized pieces or shred as preferred.
Soup:
- 2 Tbsp. olive oil
- 1 med. onion
- 1 cup celery (cut into small pieces
- 1 cup carrots (small pieces)
- 1 Tbsp. chopped fresh garlic (heaping Tbs.)
- 3 quarts chicken broth
- Kosher Salt & Pepper to taste
- 1 14.5 oz. can Stewed Tomatoes (He used Chipotle chili flavored tomatoes)
- 1 10 oz. can Rotel diced tomatoes & green chilies
- 1 can green Anaheim chilies
- 1 29 oz. can Hominy
- 1 cup frozen corn
- Optional: 1 can of beans of your choice (My dad used S & W Santa Fe style)
In a stockpot heat olive oil and sauté onions, celery, & carrots. Season with salt and pepper and saute until softened, about 5 minutes. Add garlic and sauté until just fragrant- about 1 minute. Add remaining ingredients including chicken. Salt and pepper to taste. Serve with fresh avocado, corn chips, sour cream or white cheese, a wedge of lime to squeeze and cilantro as preferred.
Since I’m watching what I eat, I opt out of the chips, cheese and sour cream and go light on the avocado. The soup is so good, you won’t even miss them. I’ll take the lime and heavy on the cilantro for me, thank you.
Yesterday I headed up to watch my Dad make his soup and he was sweet enough to send a pot home for me to serve for dinner. Here’s how he makes it:
Start by marinading the chicken in a Ziplock gallon freezer bag. He used a 1/3 parts of each of these. Set aside while you prepare the rest of the soup.
Chop up celery, onions, and carrots. Hey look, it’s a Mirepoix, the “holy trinity” of French cooking. Umm. I think I need to quit watching so much Food Network.
Add the chopped vegetables to a hot pot drizzled with a little olive oil. Stirring often, saute until the vegies start getting soft about 5 minutes, then add your garlic and cook until fragrant, about 1 minute.
Add all the remaining ingredients, except the chicken broth and the chicken of course.
Add the broth until it looks right to you (keep in mind you still need to add chicken later.) This goes for all the ingredients. If you love hominy or corn… go ahead and add more. While soup is at a a low simmer, it’s time to grill the chicken.
Sprinkle the chicken with Lime or Lemon Pepper, and place them on the grill up over medium heat. Grill chicken until tender but done, about 6-7 minutes a side. I check for doneness by pressing a finger onto the thickest part of the piece of chicken. It feels slightly firm when done. You can also do this on a grill pan indoors.
Once the chicken is off the grill, let it sit for about 15 minutes before cutting into bite sized pieces. You can also shred it if you prefer.
And add it into the soup.
It’s ready to serve anytime. It is delicious just as it is and the toppings make it over the top good. I especially couldn’t live without the cilantro.
Speaking of toppings. Do you love the little tortilla strips they put on salads that you get at restaurants like Cafe Rio? Ellie Krieger of Food Network showed how to make them at home without deep frying. We made them yesterday for the soup.
Preheat your oven to 375 degrees. Start with a small stack of corn tortillas. Brush both sides of each tortilla with vegetable oil.
Cut each tortilla in half and then in 1/4 inch strips. Arrange on a cookie sheet and season with a little salt.
Bake until crisp and golden, about 12 minutes. Try not to eat them all before you serve your soup.
Thanks Dad for another wonderful recipe.