Posts Tagged ‘sewing with kids’
A Mini Sewing Lesson
My girls have done lots of handwork when it comes to sewing. They’ve made pillows, dolls, stuffed animals and embroideries. But up until recently we haven’t ventured onto the sewing machine.
It’s not for lack of interest. They’ve probably asked to learn every time they’ve seen me sewing for the last 3 years. That’s more times than I care to admit.
I must admit to feeling a little worried about it. I am usually good at sharing (thanks mom and dad)… but this is my sewing machine we’re talking about!
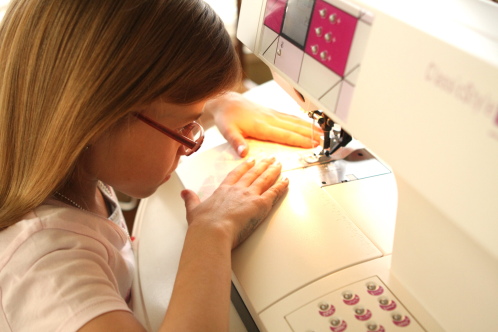
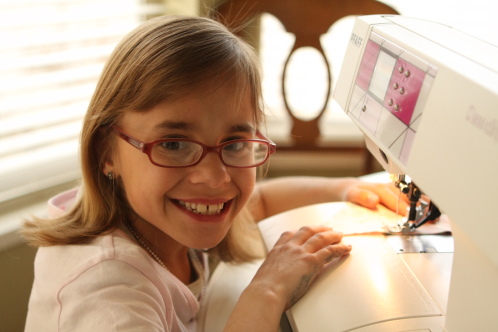
Despite feeling a bit possessive, a few months ago I bucked up and gave the girls each a lesson. We talked about how the machine works, what the knobs and buttons do, how it is threaded, and a little safety lesson. We also talked about how to guide the fabric.
Of course we learned what 1/4 inch seam is. Just as my mom taught me, I talked about watching the side of the presser foot to achieve your 1/4 inch seam and not to watch the needle.
Needless to say, learning to sew on “Mom’s sewing machine” was pretty exciting for the girls.
One of the tricks to teaching a child to sew is to find projects that are quick and easy and that give them a great sense of accomplishment when they are done.
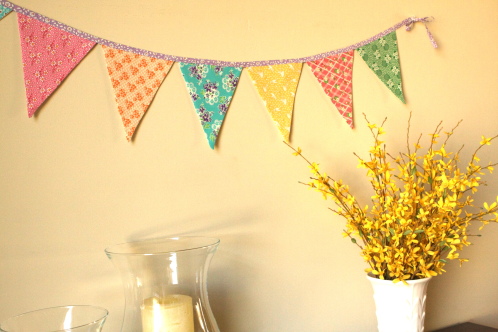
The flag bunting for my girl’s birthday party was the perfect project for a mini sewing lesson. I used my own tutorial for a flag bunting found here. Since there were 7 flags, I made the first flag to show the girls proper technique. I showed them again how to create a 1/4 inch seam. I also showed them how to turn a corner by leaving the needle in the down position, and how to take the single stitch at the point using the handwheel. I also showed them how to clip a corner and turn their flag using a chopstick.
Then they each got to make 3 flags. They helped layout the flags and I sewed them into my homemade binding tape (which took a little more control sewing right along the edge). It was a great beginning project and they were so proud of the results.
Next project I’m thinking of having them sew cozy pants or a simple skirt…. they’ve done so well, I think they might be up for it.
Make your kids something Ugly
Lily and Emma have been talking about Brookie’s ugly doll for weeks… “Brookie shared her ugly doll with me on the bus. Will you help me make an ugly doll like Brookie?”
Brooke is our darling 8 year old neighbor. Santa brought her a sewing machine for Christmas. And she has been putting it to good use making ugly dolls. But what is an Ugly Doll? After a quick internet search, I discovered that they are an oddly ugly/cute kind of doll. I’ve noticed them in movies before, but never knew what they were called. You can find their website at http://www.uglydolls.com/. The industrious Brooke designed her own doll inspired by Ugly Dolls. And this past weekend that’s exactly what Emma, Lily and I did too. Here’s how:
1. Draw a template out of paper and cut it out. Remember that you will need at least a 1/4 inch inseam, so make the template big enough to accommodate. (Or do what I did and simply cut out the fabric at least a 1/4 inch beyond the template. Just be sure to be consistent.) Remember the simpler the design of the doll, the easier it will be to make it look good. I offered to make the girls totally different style dolls, but when they saw the finished design for Lily’s they both had to have it. One trick for creating your template is to draw it out, pick the best side of your drawing, fold your template in half with the good side up and cut it out. That way your doll will be symmetrical, unless of course you want it asymmetrical.
2. Fold the fabric so that right sides are together. Pin the template to the fabric and cut out. Now you have the front and back sides of your doll.
3. Make a small round template for the eyes and cut out. I used wool felt. There is no seam allowance for the eyes, so they should be actual size. Have fun, make more than two (or just one!)
4. Using a blanket stitch, stitch around the eyes. My sewing machine does a blanket stitch which I used. But if yours doesn’t, it is very simple to do it by hand.
5. Make a french knot for the pupil of the eyes.
 6. I drew the mouth using a fabric marking pen. Using a tight zigzag stitch on your machine, stitch the mouth.
7. We cut out a tongue of wool felt and sewed it on with a blanket stitch.
8. Place front and back of doll with right sides together. Using a 1/4 inch seam stitch around the doll, leaving an opening to turn and stuff.
 9. Use a chop stick to turn the dolls right side out. Then fill with a fiberfill stuffing. I didn’t have any, so I made do with batting. I let the girls do most of the stuffing, because they wanted to be part of making the dolls. The batting we used did leave the dolls a bit lumpy but the girls don’t care.
10. Once stuffed, stitch the opening shut by hand.  Lily and Emma are so in love with their new ugly dolls that they have slept with them the last two nights. Their dolls have gone with them everywhere, including school, safely tucked in their backpacks, of course. The whole project took about 3 hours to make two dolls and the cost was a few dollars in material. But the end result is so much better than if I gone out and spent $40 on store bought toys. I love companies like Ugly Doll who are creative and have heart. And I would love to support them… but sometimes there is nothing better than “Making it Do.” You see, on Saturday I was able to spend time making memories with my girls. We used our imaginations (I got to meet Mrss. Bananana and Mrss. Jhooee!) And the girls love their dolls all the more because they designed them, chose the fabrics and worked hard to create them. Wait, did I just say work? We thought we were just having fun.

