Archive for the ‘make it a party’ Category
Game Day Pinwheels
It’s been a wild week around our house so we’re all looking forward to a fun, relaxing weekend and can’t wait to watch the big game this Sunday. I’m pretty sure I’ll be watching with one eye on the game and the other on my sewing project.
There’s four things I really love about the Super Bowl:
- Food.
- More food.
- Commercials – How smart are those ad agencies? They’ve actually made folks excited to watch the ads. Including me…. aka the Guppy.
- I can sew while I’m watching it.
Yes. I do like football. But mostly I like college football. So the Super Bowl is really just an excuse to make a bunch of fun appetizers and eat. One look around pinterest and you’ll see lots of fun appetizer ideas.
So here’s my contribution to the big Game Day food party:
Pigskin Pinwheels
Have you made puff pastry pinwheels before? They are super easy and delicious. There are lots of recipe out there with varied fillings. I’ve tried several different recipes and this one is one of my favorites. Plus it’s not too snooty for a football game.
Here are the ingredients. Puff Pastry, Ham, Gruyere, Parmesan, Mustard (I like Honey Mustard for this recipe) and pepper.
Thaw the puff pastry but keep it in the refrigerator, you’ll want to keep it really cold to make working with it easier. Unfold one puff pastry sheet on a floured surface. I love to use my pastry frame. You can use it as is, but I always roll my out a little before adding my toppings.
Before adding the mustard be aware that you will need a 3/4 inch section along the long top of your pastry for sealing the edges. Now that you know, add the mustard…
and spread it out evenly.
Next layer the ham. I cut the pieces in half for the edges to they are straight and clean. I’m using a good Black Forest Ham today. Notice the clean edge at the top.
Then layer the Gruyere. YUM. Ham and Gruyere are a match made in Heaven. Just be sure your cheese is very thinly sliced. If you like, you could also use Swiss.
Add some cracked pepper.
And some grated Parmesan.
Wet the top of the pastry with a little water on your finger.
Then roll the whole thing up.
It couldn’t be easier.
Once it’s rolled use a little more water on your finger to seal the edge, otherwise your pinwheels will open up wide when they are cooking. If all you’d like to make is pinwheels, you can skip what’s next.
If you are making little footballs then press the whole roll into an oval shape. Then pinch down the edges to make it roughly a football shape.
It’s helpful, but not necessary to wrap it all up tight in plastic wrap and put it in the refrigerator for an hour or so. You can even make it a day ahead.
Slice it into 1/2 inch slices with a sharp knife. Just an FYI, I quickly moved my roll to the cutting board since it was getting mustard on my pastry frame.
Place them an inch or so apart on a WELL greased cookie sheet. If you have a silpat, I’m jealous of you, and by all means use it.
Bake them at 400 degrees for 15 – 20 minutes, until golden brown. Because it’s puff pastry, it does PUFF while baking and loose the football shape a bit.
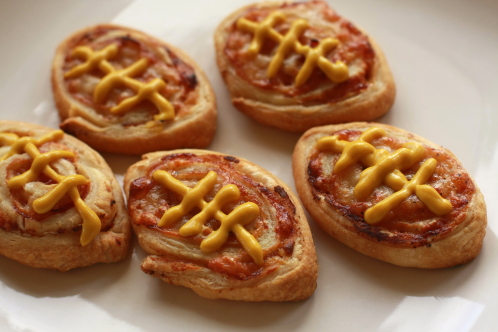
But once you top them with a little mustard football strings… they are unmistakably footballs!
In addition to eating pinwheels, I’ll probably be sewing pinwheels during the game… or broken dishes…. and laughing at funny commercials. Sounds like a perfect weekend.
Tie Dye Fun for the 4th
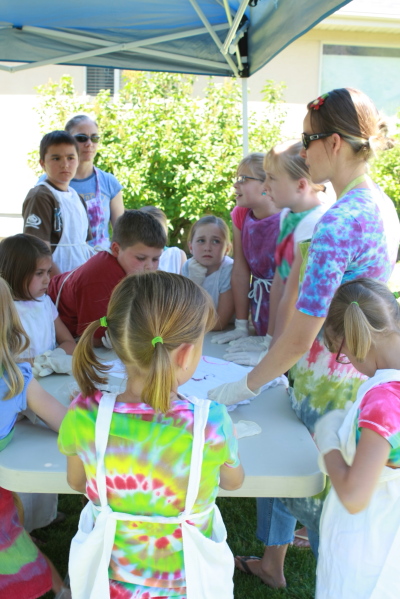
This past week we got together with our cousins for a little tie dye activity.
We invited Jen, a tie dye expert, to come teach us how to tie dye.
Jen has been tie dying for a long time… she estimated she has dyed well over a thousand items. She was so organized and knowledgeable it made our day incredibly fun… and not stressful in the least.
Jen started by having us toss our tees into a tub with water and sodium carbonate which is the main ingredient in washing soda.
We all provided our own tees. The only criteria was they needed to be 98 – 100% cotton, but it really can be any natural fiber to take the dye.
The best part about tie dye is that you can “rescue” a stained or old shirt by giving it new life with dye. Just carefully dye over the stain and voila… just like new.
The shirts only need a two minute soak… then we wrung them out….
And tossed them up on a drying rack. The dye on a tee that is too wet will run all together. Totally dry and the die will not soak in well.
Once the shirts are damp dry…
It was time to fold the shirts. This was a cool method. Lily is making a swirl by sticking a fork into the spot she wants the swirl to start, and then twisting. Jen is making sure the shirt sort of folds neatly around the swirl.
Jen was amazing at knowing how the pattern would turn out and showed us how to make swirls, stripes, star bursts, and even hearts.
Here’s my husband’s tee, in the same swirl as the shirt above. Then we put on the rubber bands like a pie that has been cut, a pie with three rubber bands to make six slices. I dyed a different color of dye in each section.
Then it was time to dye.And dye some more.
Even the littler kids were able to dye their own shirts. They LOVED it.
The hardest part was bagging up our shirts and waiting 24 hours to rinse them out and wash and dry them.
The suspense almost killed the kids.
All of the kids made their Tie Dye Shirts in Red, Blue, and Turquoise on their white shirts.
Come 4th of July we’ll all be sporting our tie dyed shirts at the neighborhood parade.
If you live in Utah County and are interested in having Jen create a tie dye event for you… here’s her contact information. She provided everything we needed for our fun… including tables, a shade cover… and all the supplies except the shirts. Her rates are very reasonable. (PS. it says St. George on her logo but she lives in Provo now.)
If you want to try dying on your own, there are lots of resources on the web. Just Google how to tie dye.